Learn how to score prospects in real time using Signals and machine learning
Welcome to the Snowplow Signals real-time prospect scoring tutorial.
Snowplow Signals is a real-time personalization engine for customer intelligence, built on Snowplow's behavioral data pipeline. It allows you to compute, access, and act on in-session stream and historical user data, in real time.
This guide will through the process of building a real-time prospect scoring system using Signals together with a machine learning model. You'll learn how to leverage Snowplow event data to predict a prospect's likelihood to convert on your website, and how to trigger personalized engagements.
Use this tutorial as a starting point for how to integrate Signals data with any ML use cases or other back-end services.
The tutorial uses the Snowplow marketing website as an example. Follow along using your own website and Snowplow data.
At the end of the tutorial, you will:
- See live prospect attribute updates in the browser console
- Score prospects using an ML model
- Be ready to use the outputs to drive decisions on your website
Business case overview
Prospects on the Snowplow marketing website visit product and pricing pages, watch videos, etc. The key call to action is a form submission to request a demo.
We want to predict if a specific prospect is likely to submit a form in the next hour, given their behavior before the prediction moment.
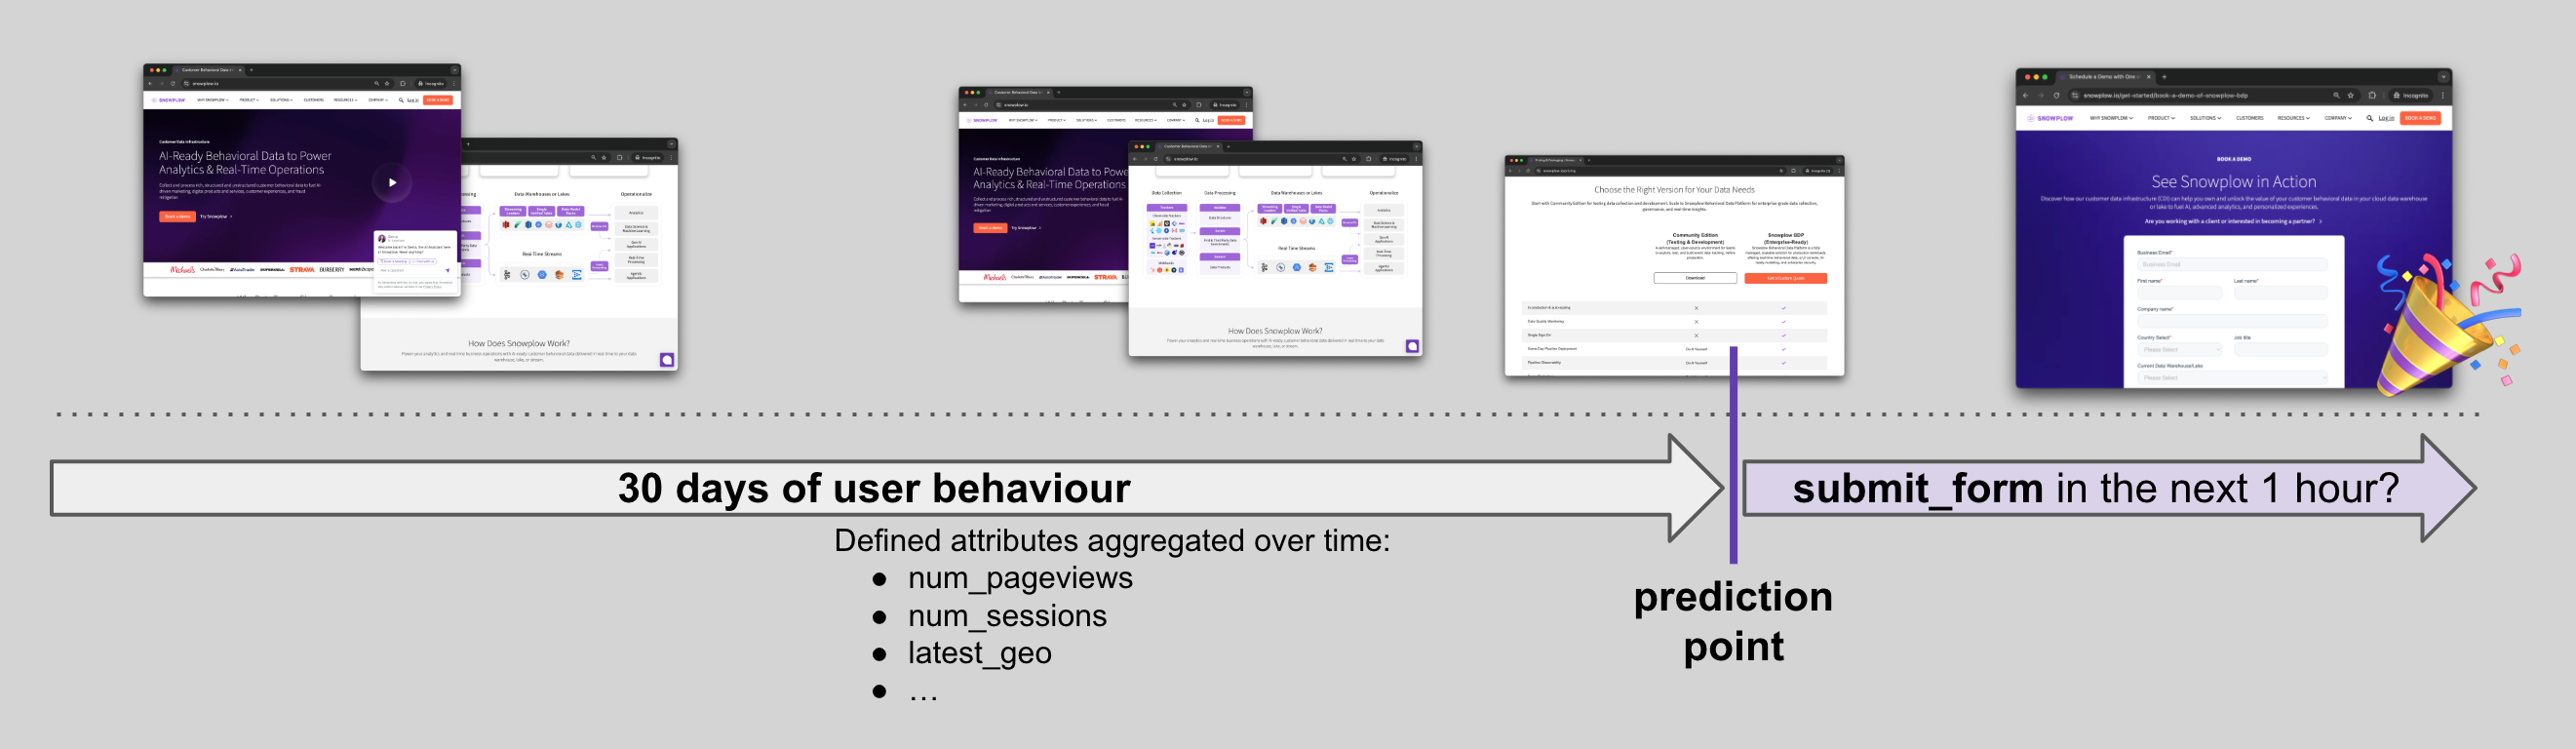
For simplicity in this tutorial, we'll score prospects every 10 seconds as they browse the website. Depending on your requirements, you could score prospects at the start of each page_view, after certain events, or at some other time interval.
We're calculating aggregated attributes based off real-time stream event data, so won't have much user history to work with initially. Over time, as prospects visit and revisit the website, the attributes will become more meaningful.
Prerequisites
- Please follow Connect to Signals page to setup the Signals connection (Console or Sandbox)
- Signals Sandbox: follow the Sandbox setup flow
- Signals Customers: follow the Console setup flow
- Open this Google Colab notebook to follow along
- [Optional] Integrate Snowplow into your website. If you use Signals Sandbox - find your collector URL in the UI
Architecture
The system consists of three main blocks:
- Your marketing website: as users browse the website, Snowplow events are sent to the Snowplow Collector
- Snowplow Infrastructure: the Collector captures the events, and Signals calculates aggregated user attributes in real time e.g.,
num_page_views,num_customers_views - Intermediary
/predictAPI: an API that calls the Signals API to get the latest attributes, runs an ML model on the Signals output, and sends the response back
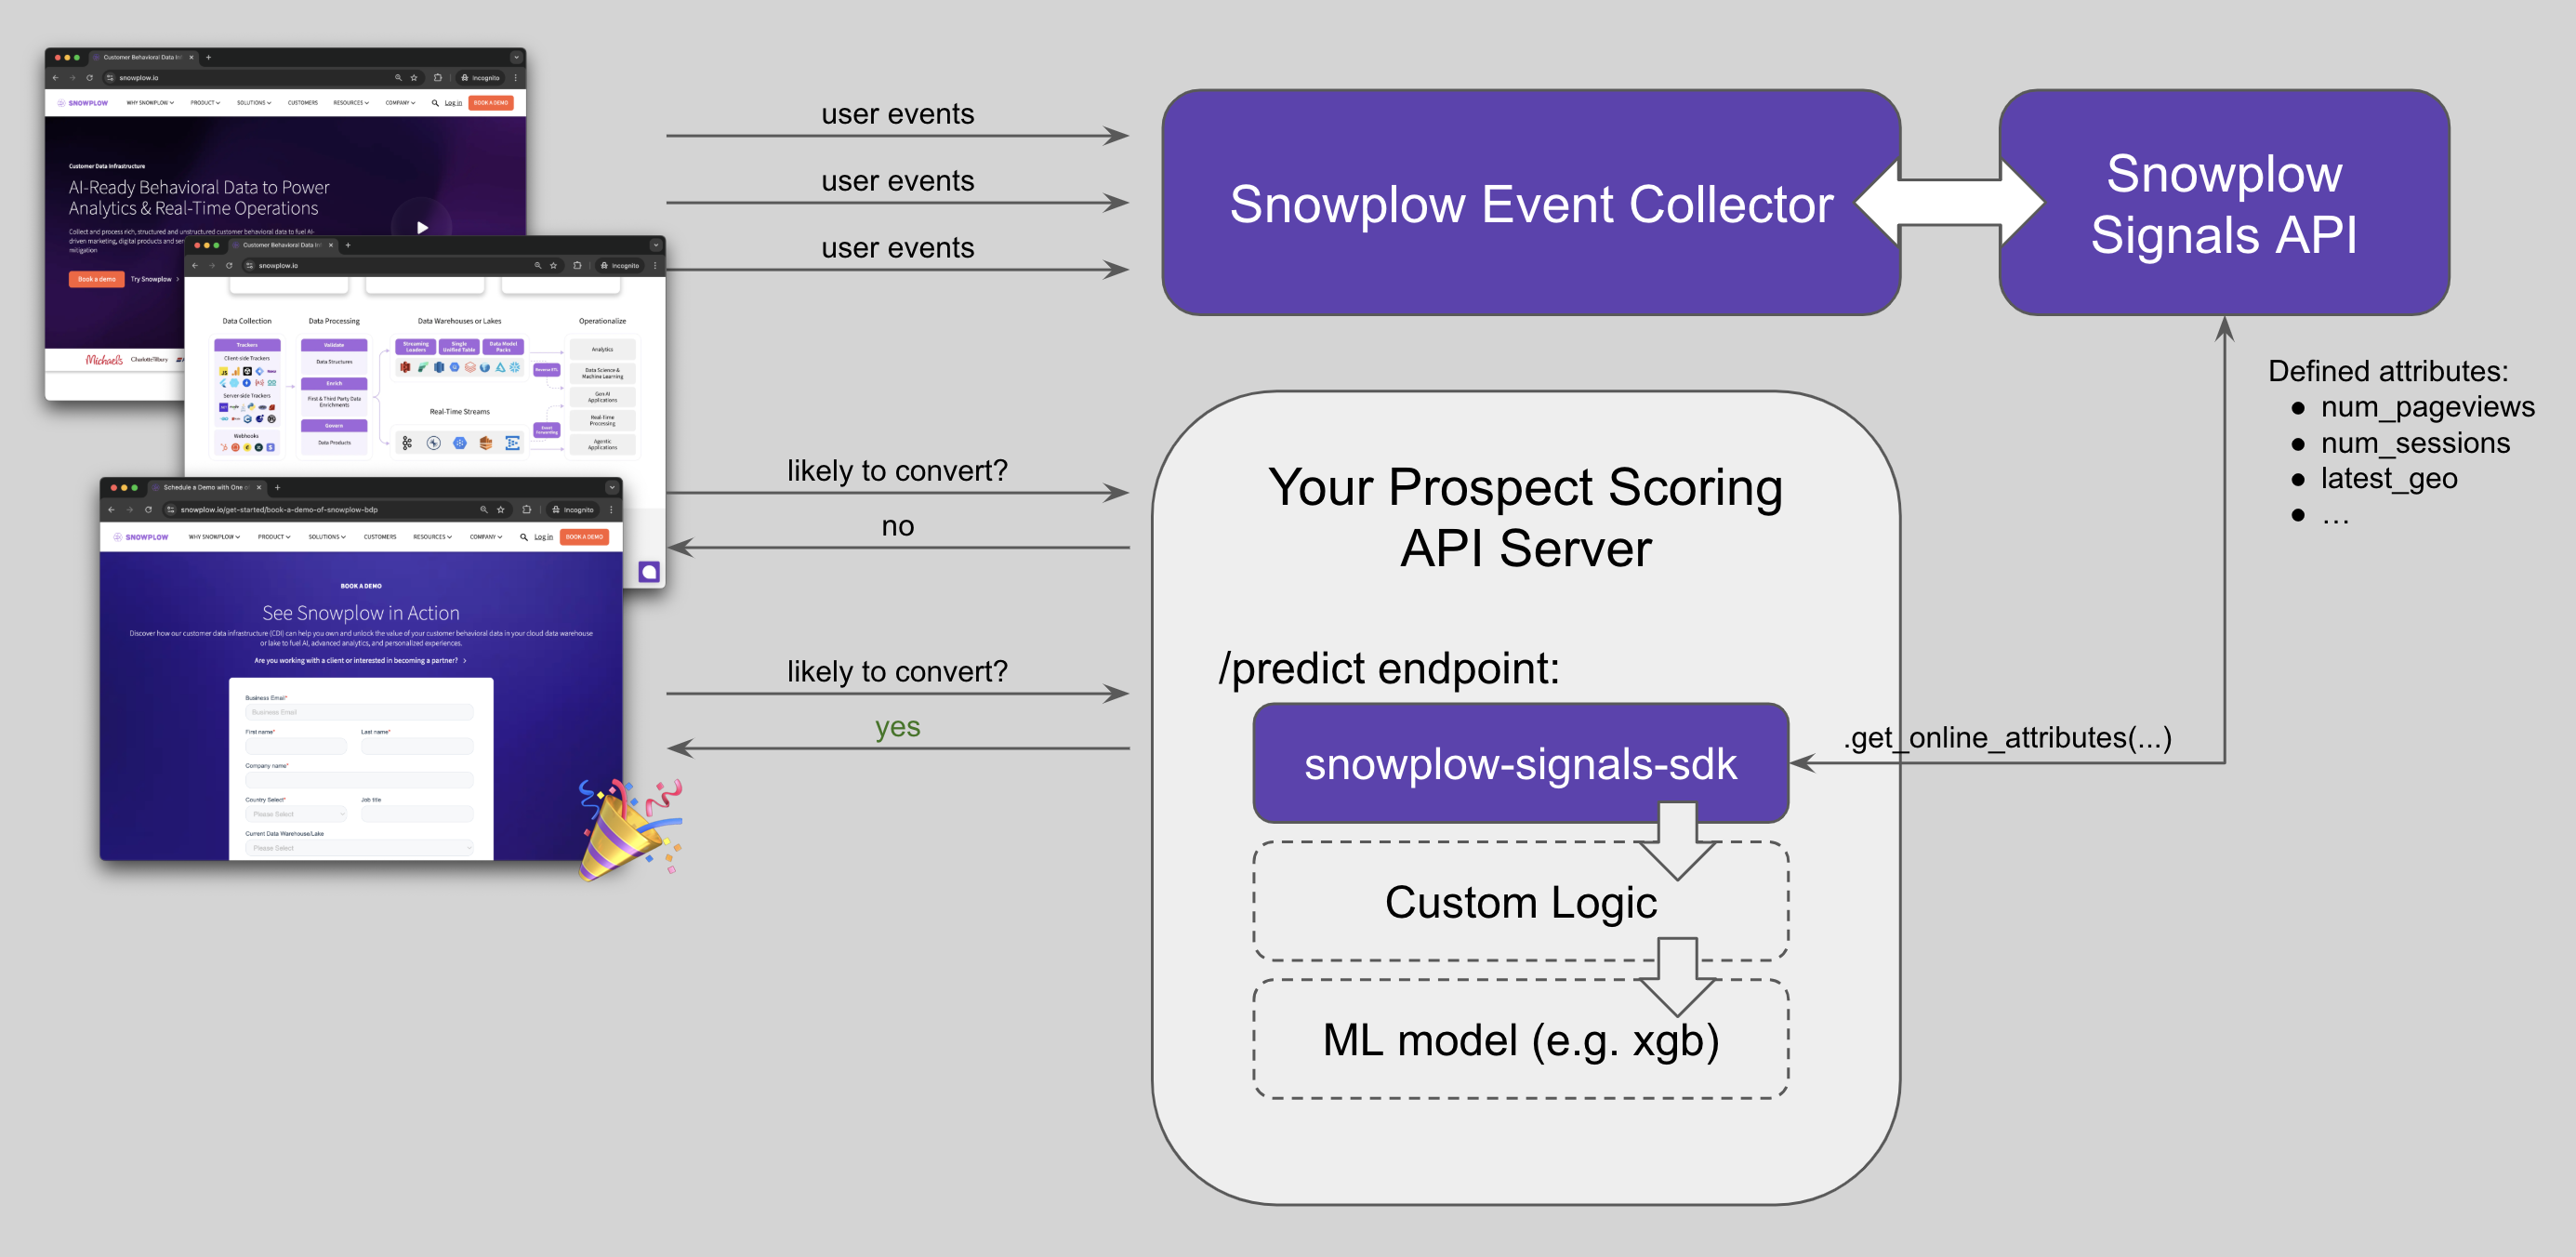
You can replace the ML model with any other back-end system that you'd use to act on live prospects' attributes.