Capture abandoned browse behavior with the JavaScript tracker
To begin, we will set up Snowplow tracking on your ecommerce website. In this section we will capture what products a customer views, how long they view them for and if they add them to their cart. We assume that you already have a Snowplow pipeline. If you do not yet have a pipeline running, please return to the Introduction information on the different deployment options.
First, initialize the Snowplow JavaScript tracker. Below is an example of how to set up the tracker:
; (function (p, l, o, w, i, n, g) {
  if (!p[i]) {
    p.GlobalSnowplowNamespace = p.GlobalSnowplowNamespace || [];
    p.GlobalSnowplowNamespace.push(i); p[i] = function () {
      (p[i].q = p[i].q || []).push(arguments)
    }; p[i].q = p[i].q || []; n = l.createElement(o); g = l.getElementsByTagName(o)[0]; n.async = 1;
    n.src = w; g.parentNode.insertBefore(n, g)
  }
}(window, document, "script", "https://cdn.jsdelivr.net/npm/@snowplow/javascript-tracker@latest/dist/sp.lite.js", "snowplow"));

// Replace with your collector URL
var collector = "yourcollector.site.com";

window.snowplow('newTracker', 'trackerName', collector, {
  encodeBase64: false,
  appId: 'ecommerceDemo',
  platform: 'web',
  contexts: {
    webPage: true,
    performanceTiming: true
  }
});

// Add ecommerce accelerator plugin
window.snowplow(
  'addPlugin',
  'https://cdn.jsdelivr.net/npm/@snowplow/browser-plugin-snowplow-ecommerce@latest/dist/index.umd.min.js',
  ['snowplowEcommerceAccelerator', 'SnowplowEcommercePlugin']
);
Track page views and user engagement time
We want to understand how long a product is viewed for in order to determine the which product each customer is paying the most attention to.
Use the enableActivityTracking function to calculate the time the user is actively engaged on the page:
- minimumVisitLength: the minimum time (in seconds) a user must stay on the page before tracking starts
- heartbeatDelay: the interval (in seconds) at which activity pings are sent
If you change these parameters, make sure to update the values in the data modeling step.
This event must be called before the trackPageView function.
snowplow('enableActivityTracking', {
  minimumVisitLength: 5,
  heartbeatDelay: 5
});

snowplow('trackPageView');
Test your tracking
To verify your tracking implementation, use the Snowplow Chrome extension. This extension allows you to inspect Snowplow events in real-time as they are sent from your website. Navigate to your product pages and add items to cart while monitoring the extension to ensure events are firing correctly with all expected parameters. The extension will show you the full event payload including all entities and properties, making it easy to debug your implementation.
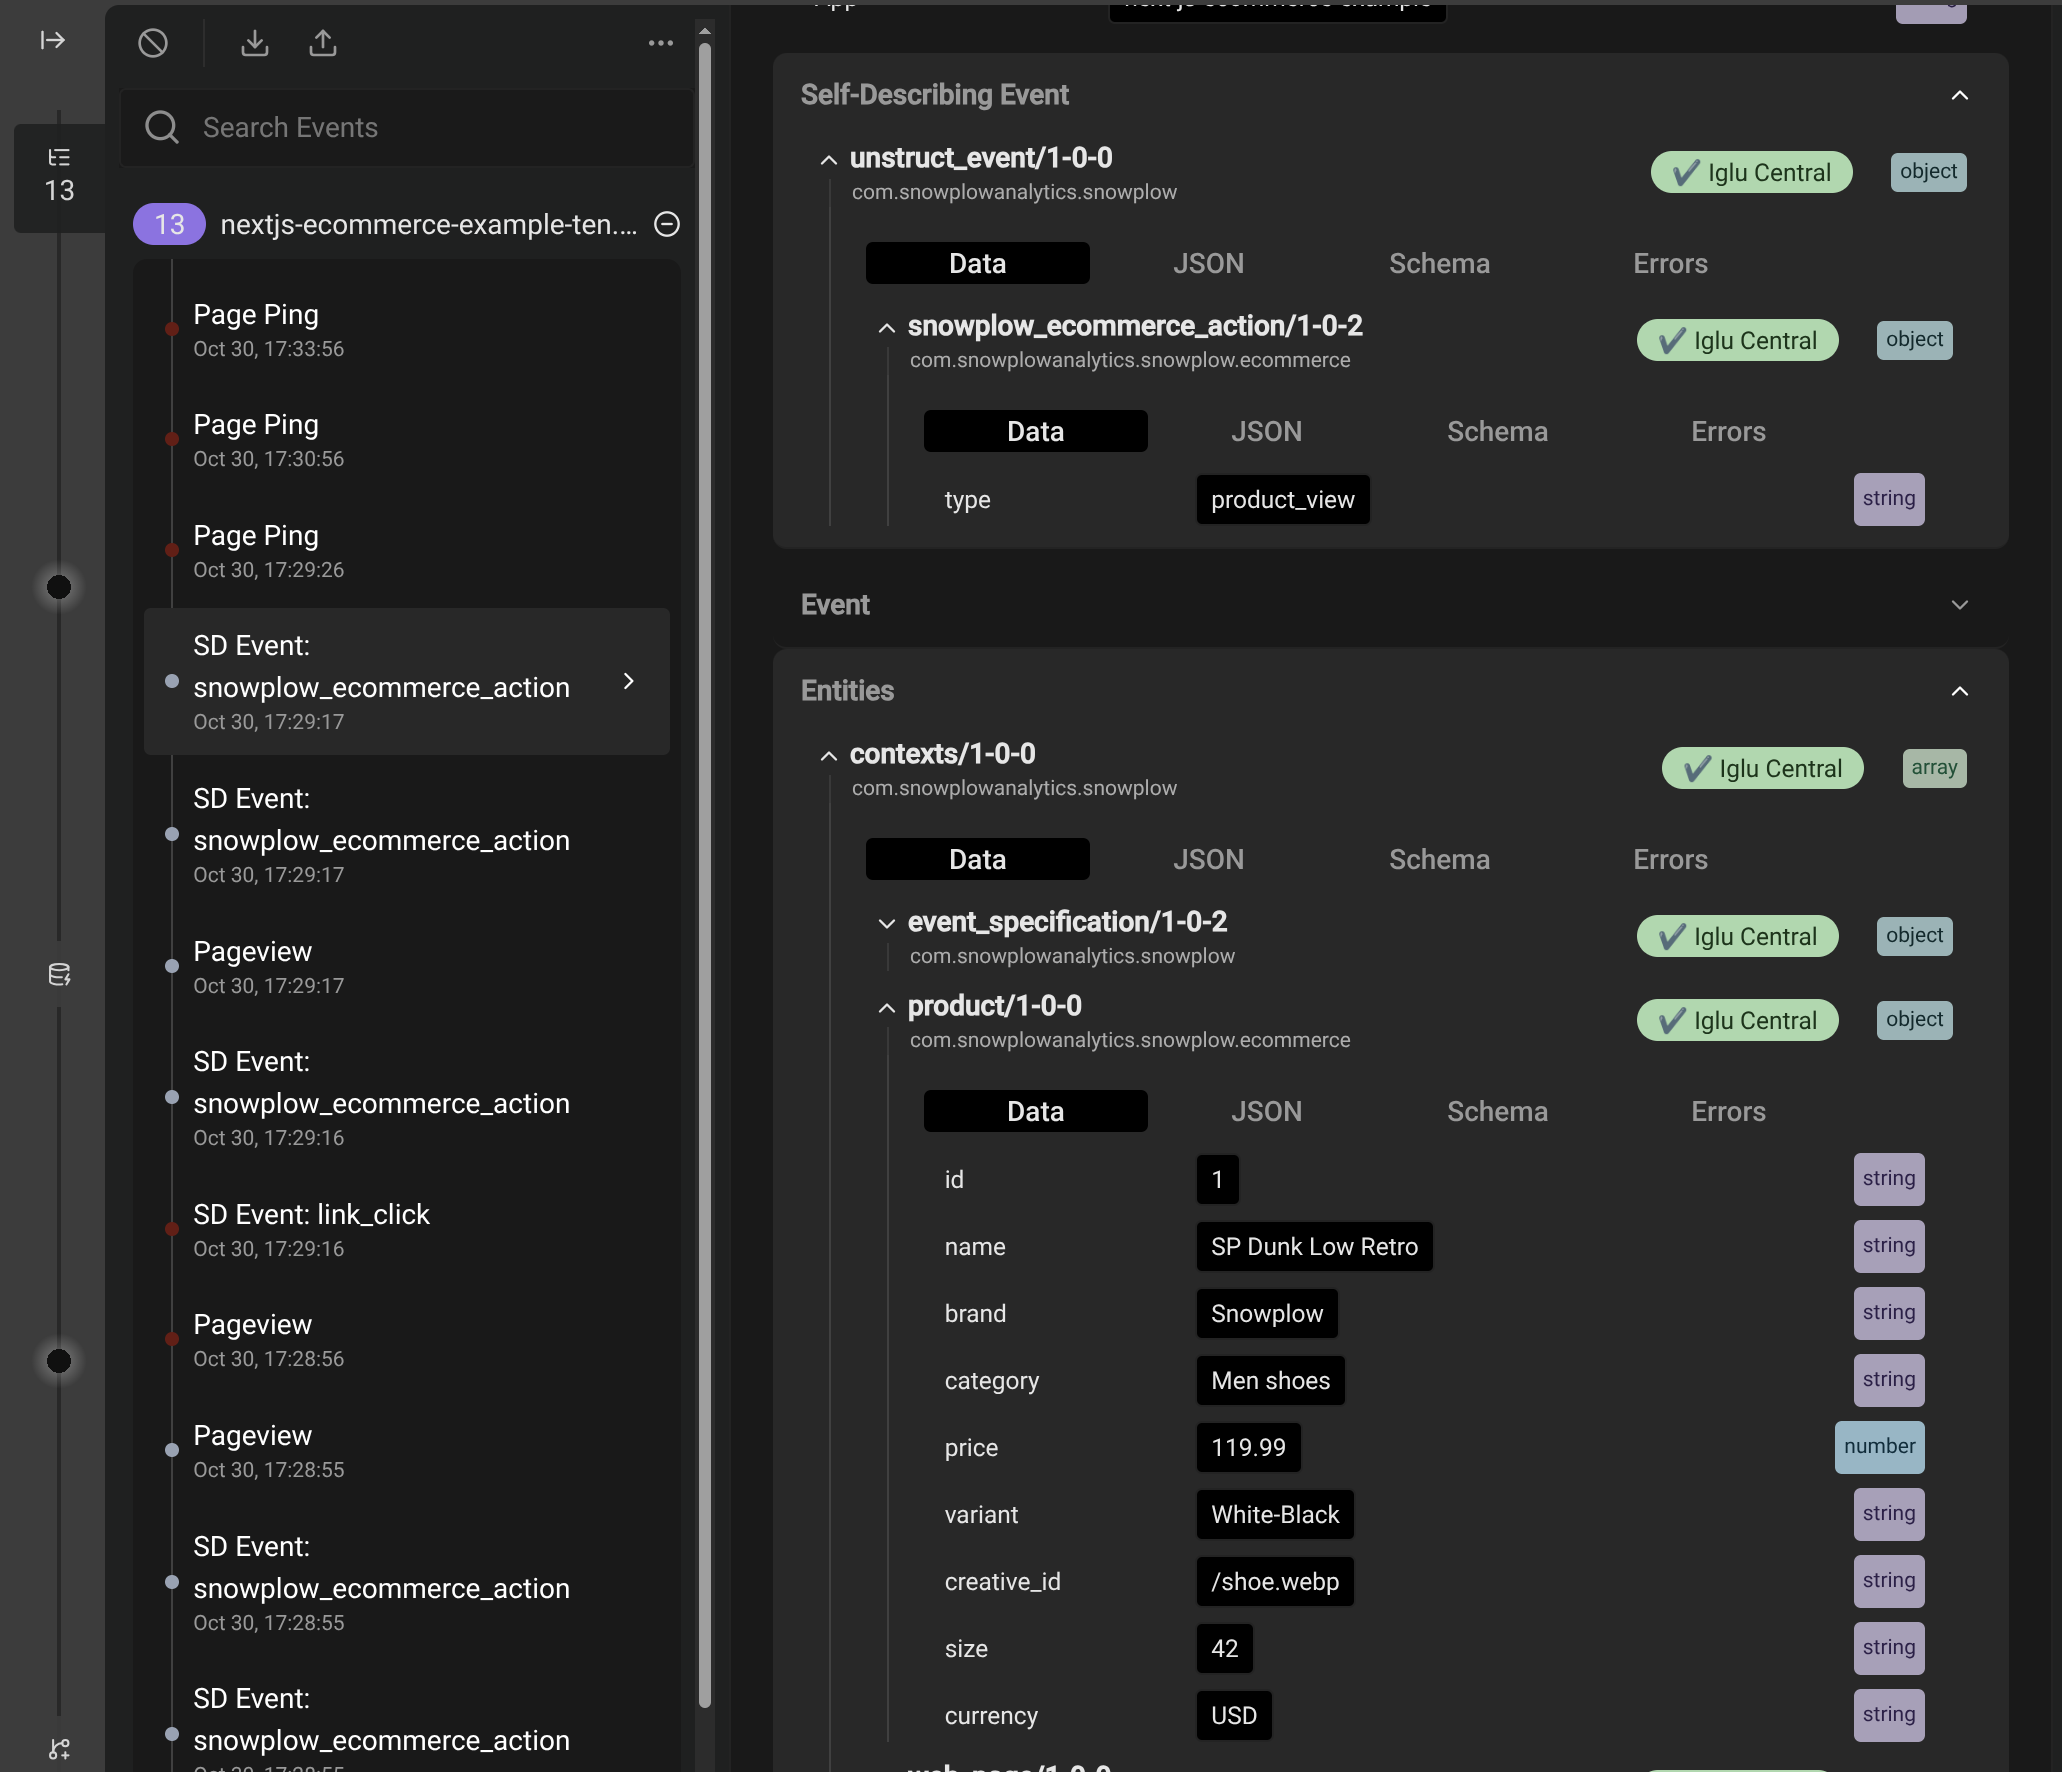
Track product views
Implement the product view tracking when a product is viewed. This will create a column in the warehouse dedicated to storing information on viewed products. Please ensure you use the correct data type for each variable. Refer to the ecommerce documentation for further information.
  snowplow('trackProductView', {
    id: "12345",
    name: "Baseball T",
    brand: "Snowplow",
    category: "apparel",
    price: 200,
    currency: "USD",
});
Track "add to cart" events
Track "add to cart" events so users that perform this action can be filtered out or be placed in a different cohort. Below is an example implementation, showing a single product being added to the cart.
window.snowplow("trackAddToCart", {
  products: [
    {
      id: "P125",
      name: "Baseball T",
      brand: "Snowplow",
      category: "Mens/Apparel",
      price: 200,
      currency: "USD",
    },
  ],
  total_value: 200,
  currency: "USD",
});
Once add to cart events are tracked, the event should look like this in your Snowplow Chrome extension.
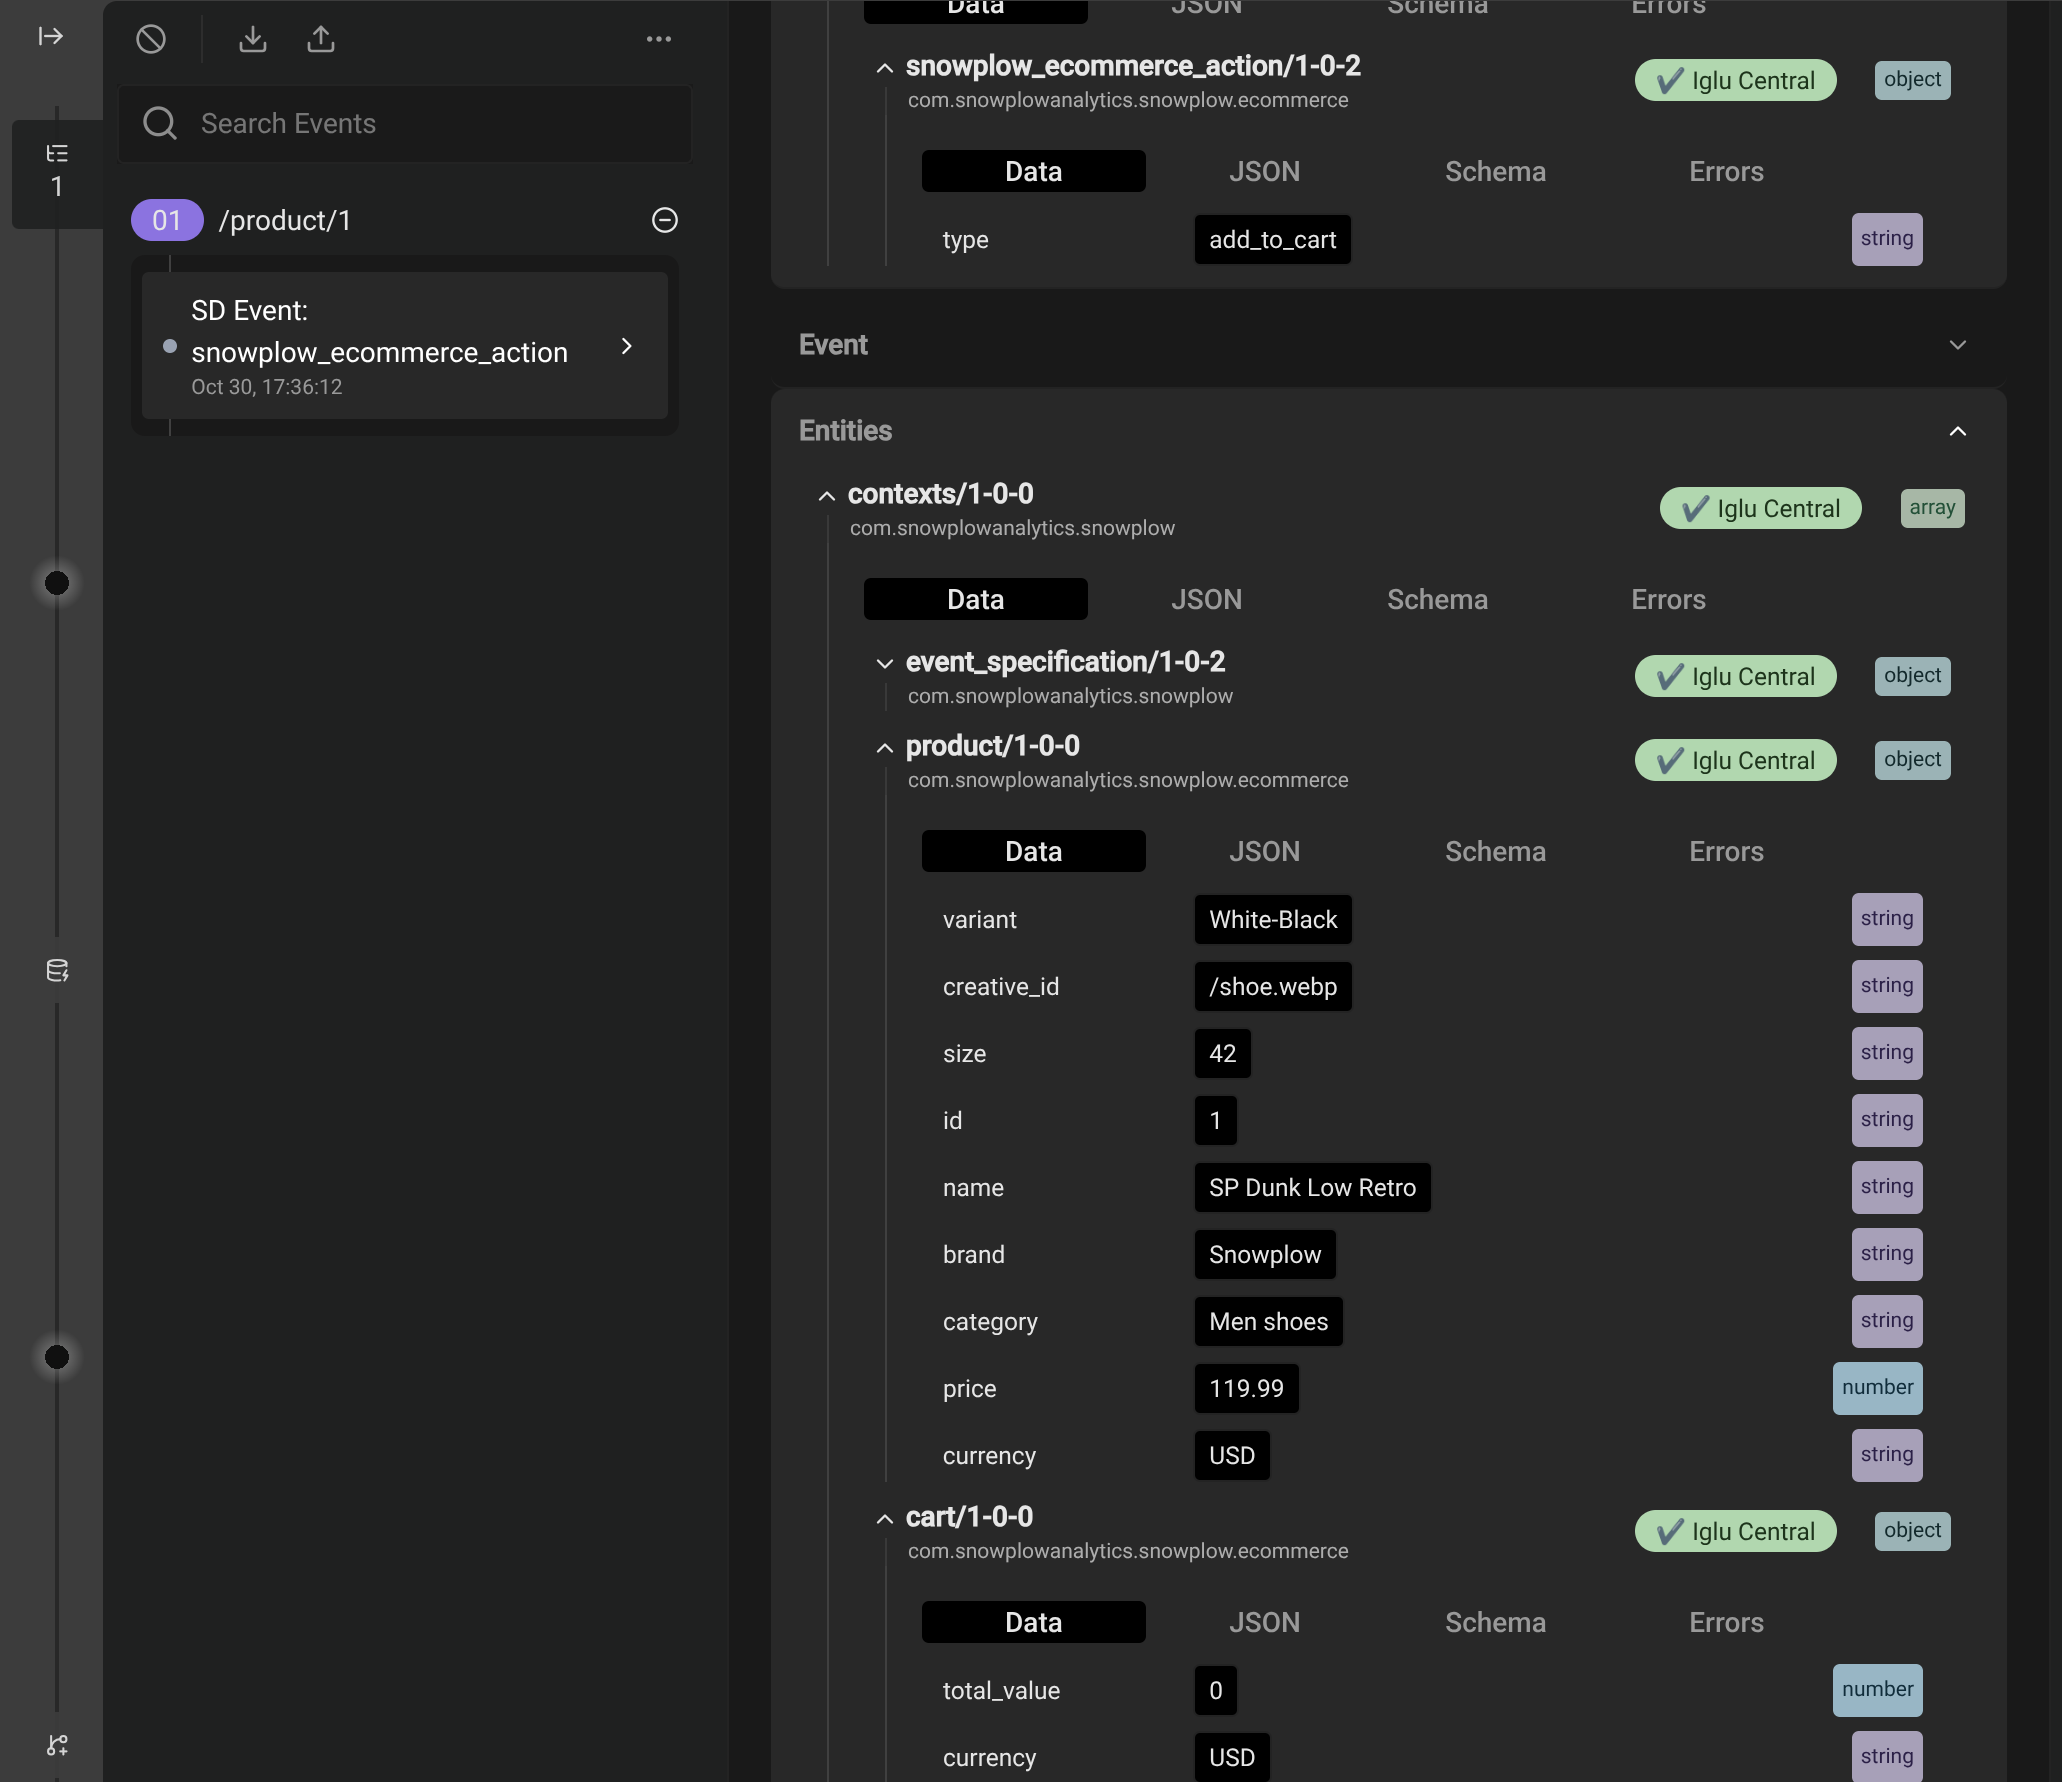
Explanation of parameters
id: the unique identifier for the productname: the product's nameprice: the product's price as a floating-point numberbrand: the brand associated with the productcurrency: the currency code (e.g., USD, EUR)category: the product's category or taxonomytotal_value: the updated total cart value after adding the product