Integrate with with Census using reverse ETL
Next we will set up a Census sync to build an audience using our query from Snowflake, filter the audience to focus on users who have shown interest in products but haven't purchased, and sync the data to Braze.
Connect Census to Snowflake
- Log into your Census account (sign up if needed)
- Go to Sources
- Click New Source
- Select Snowflake
- Enter your Snowflake connection details. Refer to the documentation if you have any questions
- Test the connection and save
Create your abandoned browse audience
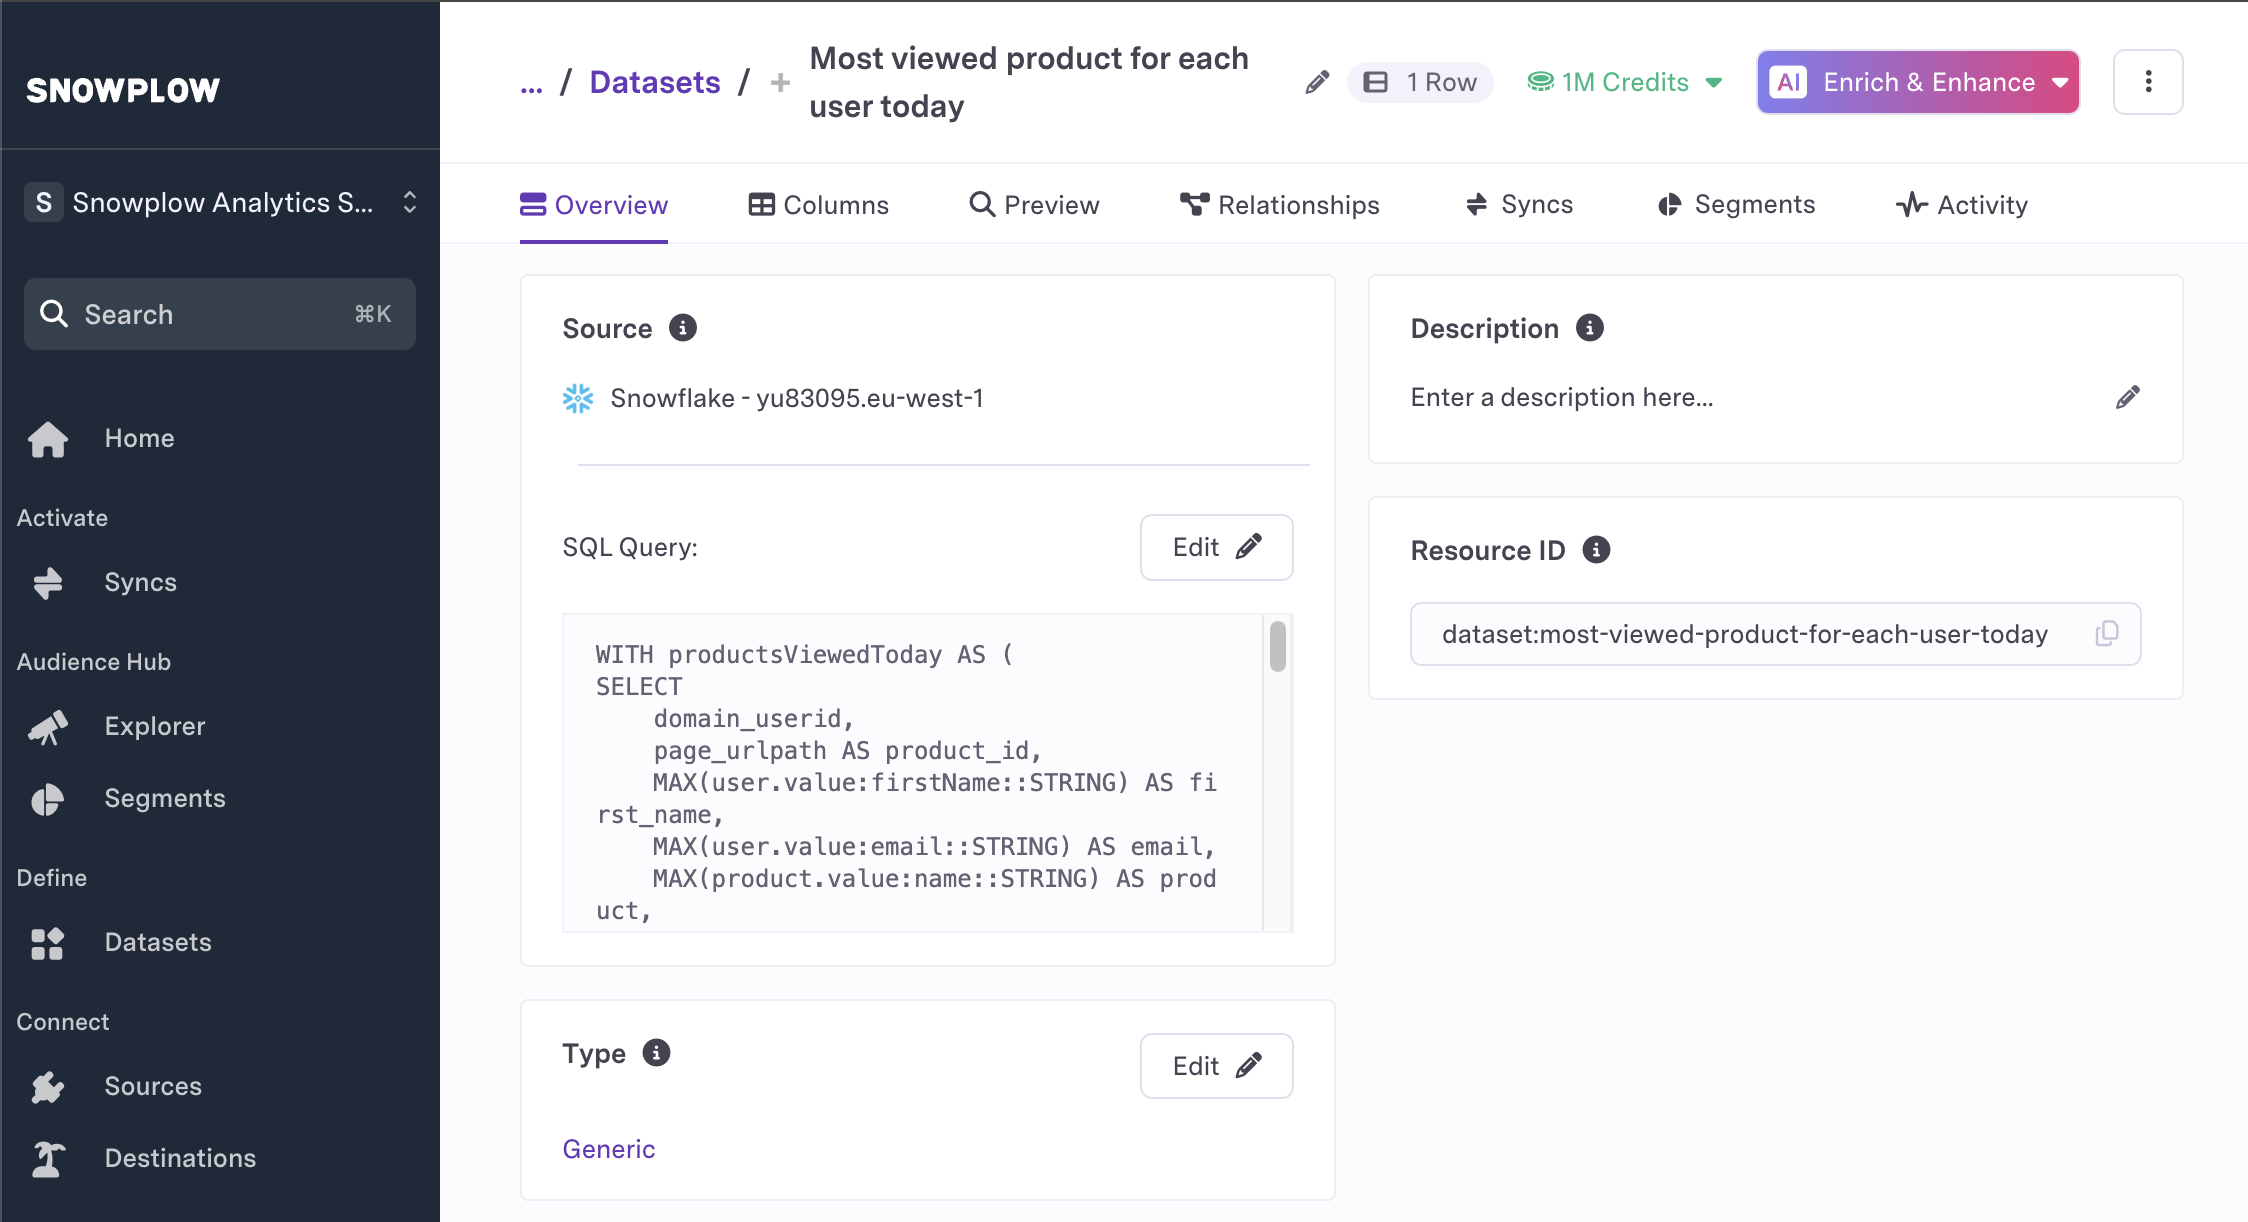
Use the query from the data modeling step to identify users who have shown interest in products but haven't purchased. Here it is again:
sql
WITH productsViewedToday AS (
    SELECT
        domain_userid,
        page_urlpath AS product_id,
        MAX(user_id) AS email,
        MAX(product.value:name::STRING) AS product,
        5 * SUM(CASE WHEN event_name = 'page_ping' THEN 1 ELSE 0 END) AS time_engaged_in_s,
        MAX(
            CASE
                WHEN ecom_action.value:type = 'add_to_cart'
                THEN TRUE
                ELSE FALSE
            END
        ) AS add_to_cart,
        MAX(
            CASE
                WHEN page_urlquery = 'abandonedEmail=true'
                THEN TRUE
                ELSE FALSE
            END
        ) AS winback_successful,
        MAX(page_url) AS product_url
    FROM
        SNOWPLOW_SALES_AWS_PROD1_DB.ATOMIC.EVENTS,
        LATERAL FLATTEN(input => contexts_com_snowplowanalytics_snowplow_ecommerce_product_1) product,
        LATERAL FLATTEN(input => contexts_com_snowplowanalytics_snowplow_web_page_1) page,
        LATERAL FLATTEN(input => unstruct_event_com_snowplowanalytics_snowplow_ecommerce_snowplow_ecommerce_action_1) ecom_action
    WHERE
        DATE(load_tstamp) = CURRENT_DATE()
        AND page_urlpath LIKE '/product%'
    GROUP BY
        1, 2
    ORDER BY
        time_engaged_in_s DESC
)

SELECT
    a.*
FROM
    productsViewedToday a
LEFT JOIN
    productsViewedToday b
    ON a.email = b.email
    AND a.time_engaged_in_s < b.time_engaged_in_s
WHERE
    b.time_engaged_in_s IS NULL
    AND a.email IS NOT NULL;
Set up the Census sync
-
In Census, go to Syncs and click Create New Sync
-
For the source:
- select your Snowflake connection
- configure the authentication method
-
Configure the dataset:
- select Datasets from the menu
- select the Snowflake source
- enter the SQL query above
- click Preview and ensure it returns data
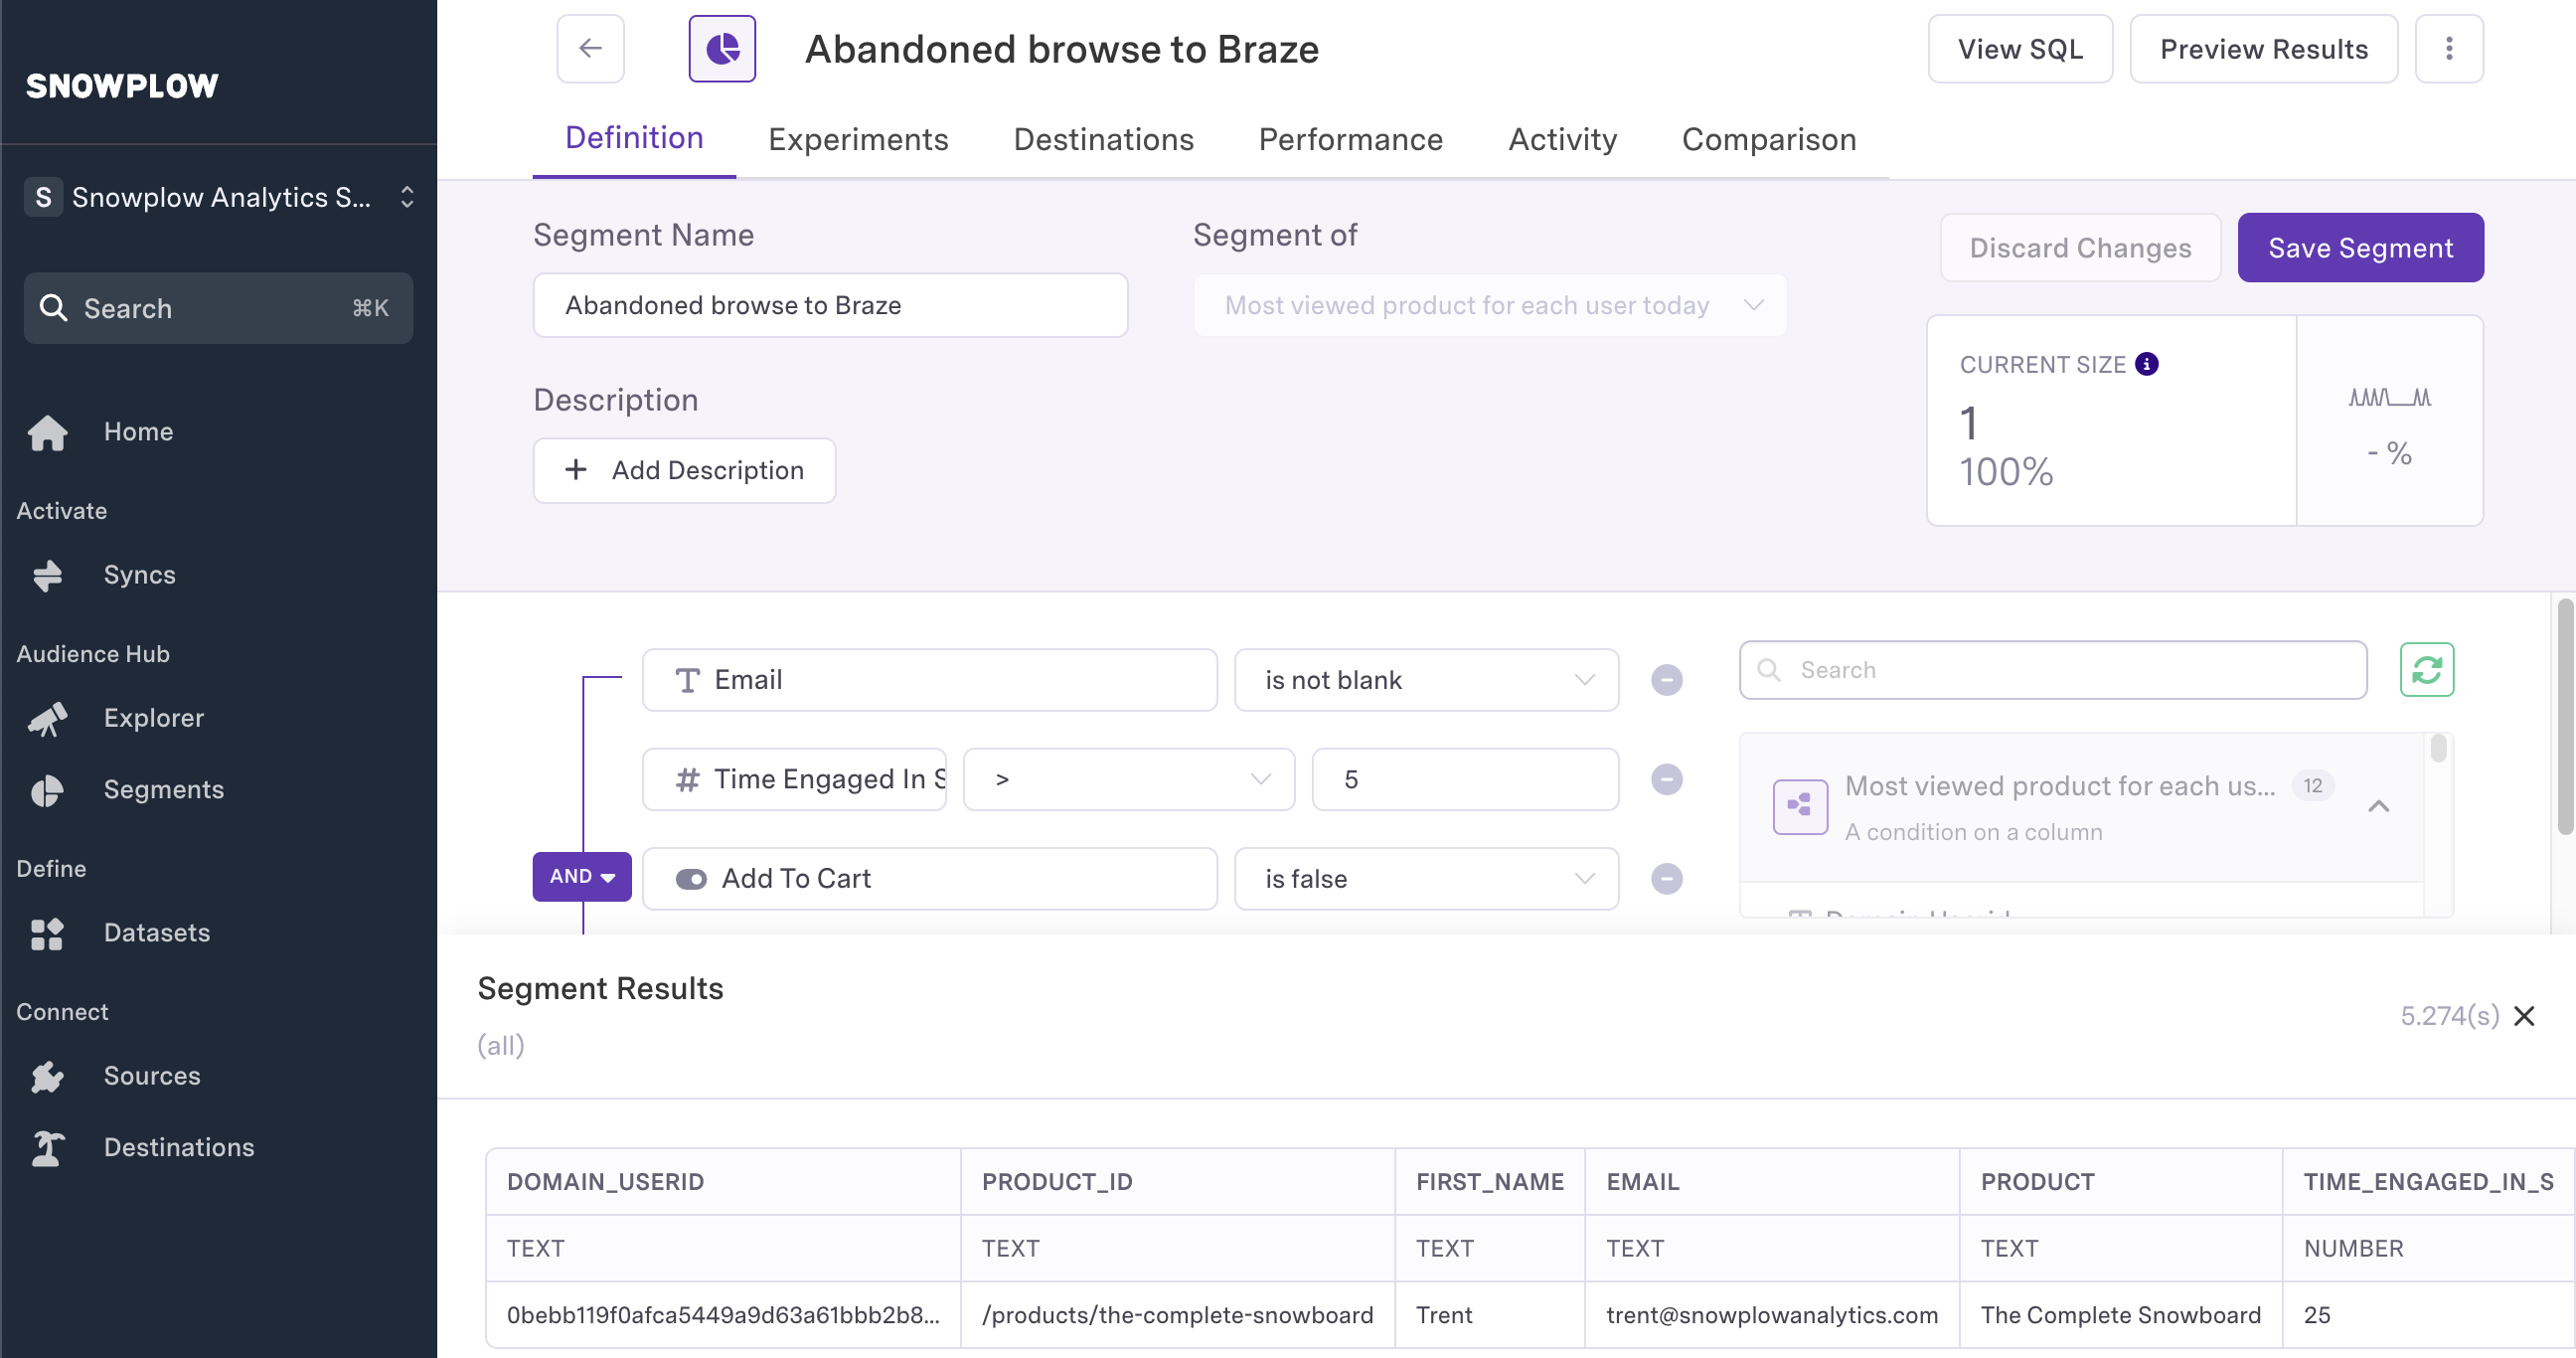
- Configure the audience segment:
- select Segments from the menu
- click New Segment
- under Segment Of, select the dataset from the previous step
- add filters to the segment based on the image below
- click preview to confirm that the correct data is being returned
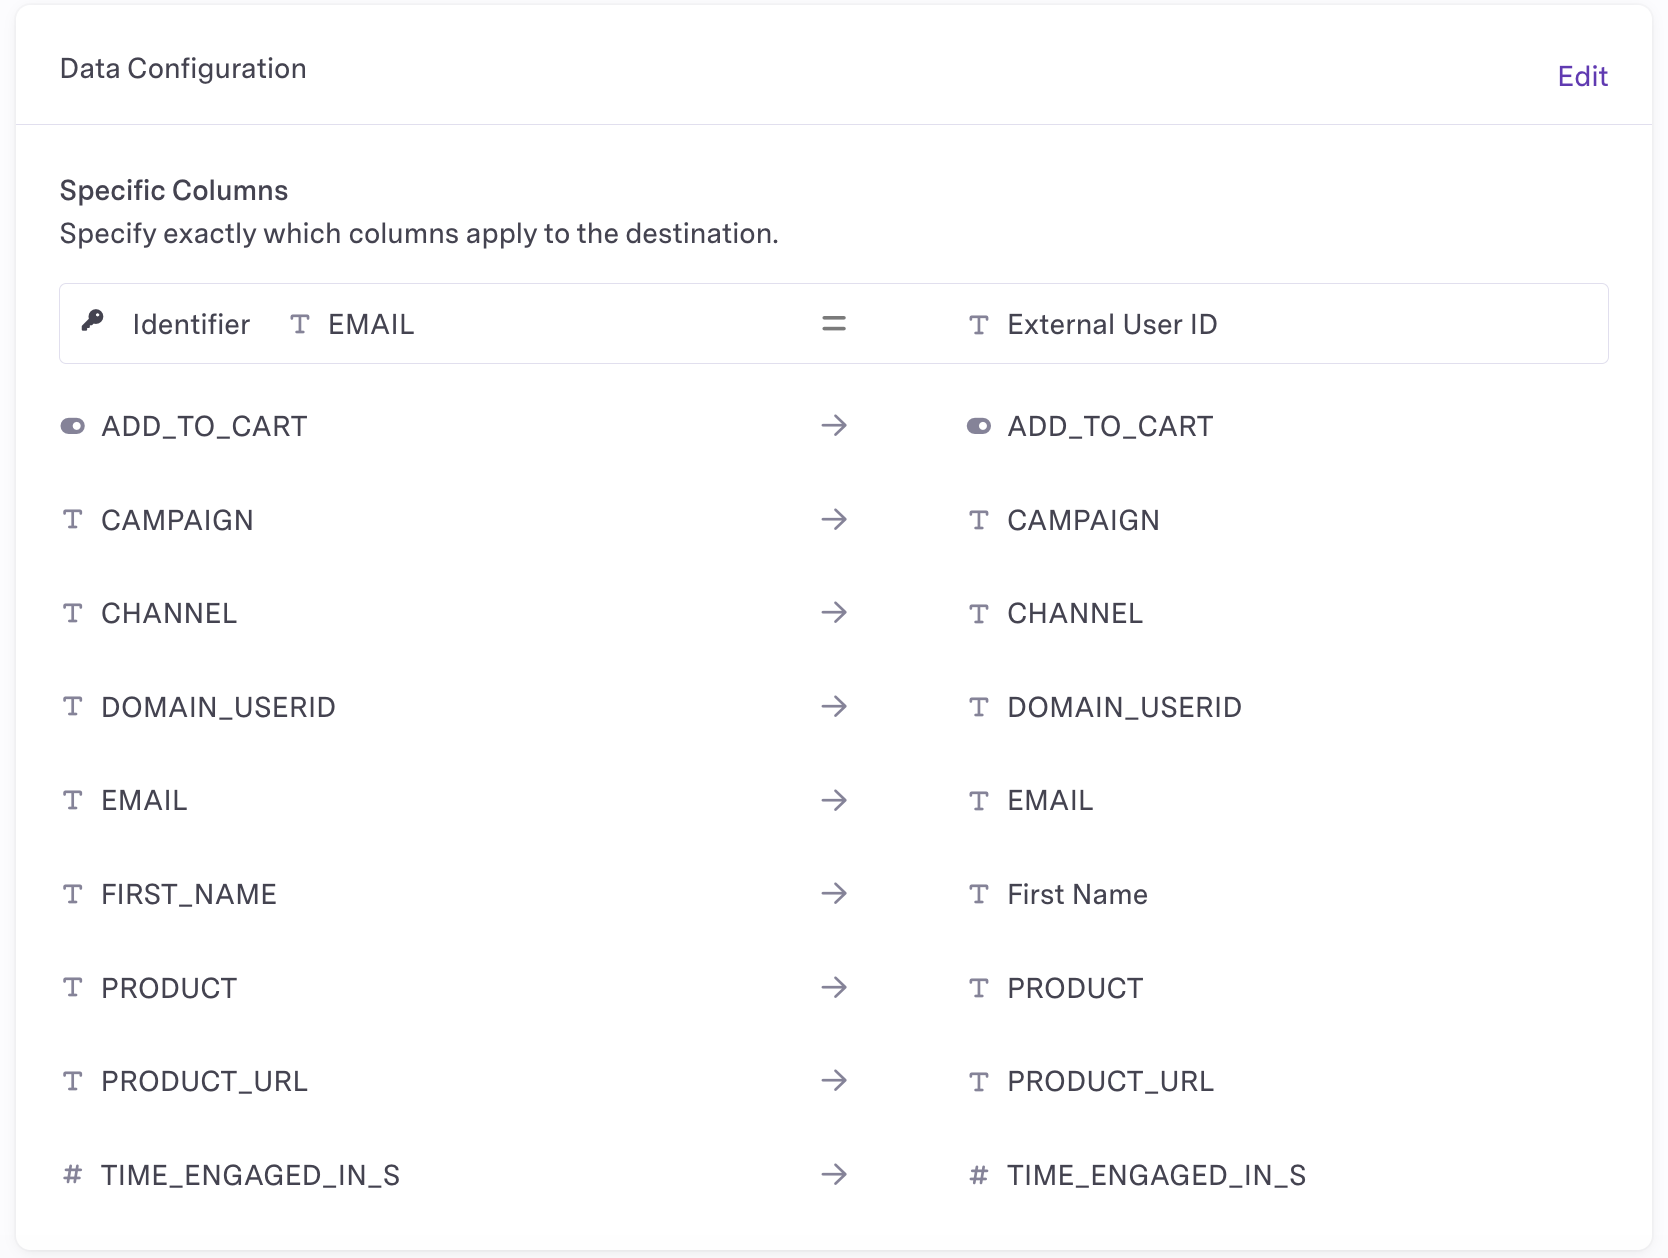
- Configure the sync settings to send data from our audience to Braze:
- select Syncs from the menu
- click New Sync
- under Source, select the audience from the previous step
- under Destination, select Braze
- configure the mapping as shown in the image below
- click Run Now
Monitoring and optimization
- Monitor sync status in Census dashboard
- Track campaign performance metrics
- A/B test different message content and timing
- Adjust view time thresholds based on results
Best practices
- Review view time thresholds (10+ seconds) to ensure genuine interest
- Include product images and details in your messages
- Add urgency elements (e.g., limited time offers)
- Test different message sequences and timings
- Monitor unsubscribe rates to avoid message fatigue
By following these steps, you'll have an automated system that identifies users showing genuine interest in products and triggers relevant abandoned browse campaigns to encourage purchases.
Next step
Proceed to the creating campaigns in Braze step to set up your marketing automation campaign.