Quick start guide for using Snowplow in Google Tag Manager
This guide will walk you through the initial setup for Snowplow in Google Tag Manager.
Adding the Templates
To get started with Snowplow in Google Tag Manager, you will need to add the Snowplow Tag Template and the Snowplow Settings Variable Template to your GTM workspace.
Links to both templates can be found here.
Snowplow Tag Template
- Navigate to the
Templatestab in your GTM workspace and click theSearch Gallerybutton in theTag Templatessection.
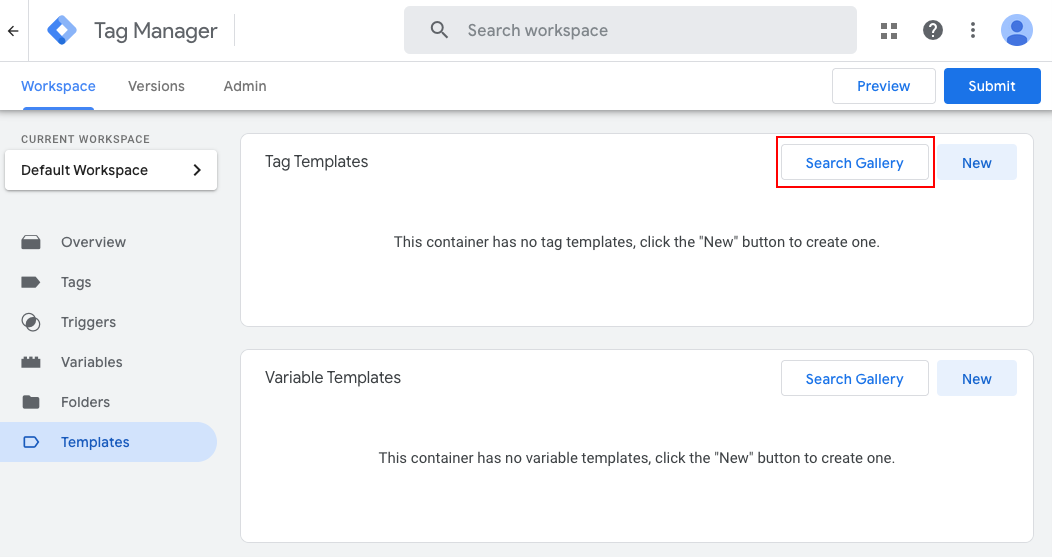
- Search for "Snowplow v4"
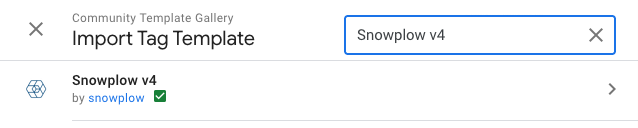
- Click on the template, and then click
Add to Workspacein the next screen. Review the permissions and clickAddto finalize the import.
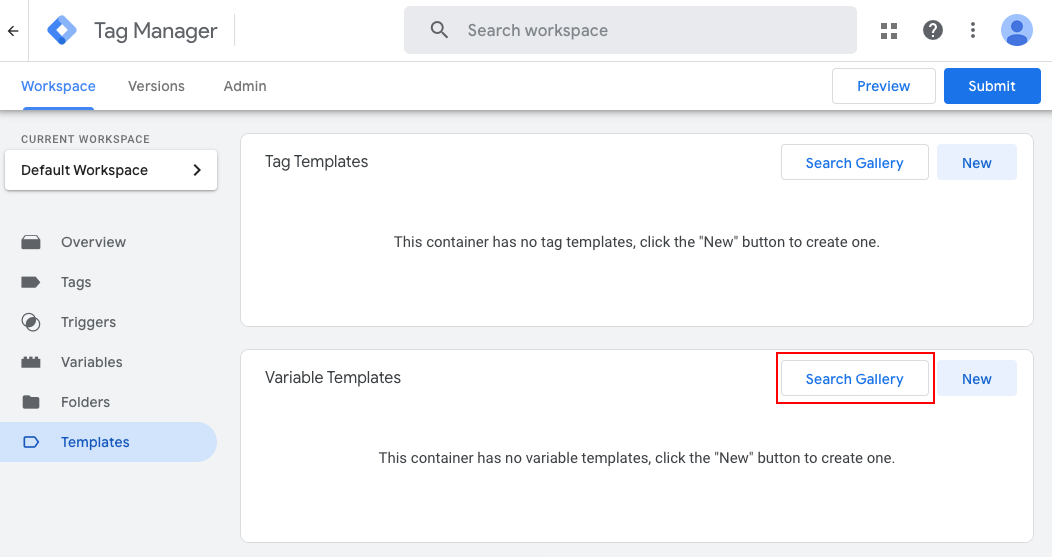
Snowplow Settings Variable Template
The Snowplow Settings Variable template is used to configure the Snowplow tracker, such as the collector endpoint, privacy options, and tracker version. Although possible to use the Snowplow tag without the settings variable, it's highly recommended to use it for ease of configuration, along with keeping the tracker configuration separate from the tag.
- Again in the
Templatestab in your GTM workspace, click theSearch Gallerybutton in theVariable Templatessection.
-
Search for "Snowplow v4 Settings"
-
Click on the template, and then click
Add to Workspacein the next screen. No permissions are required, so clickAddto finalize the import.
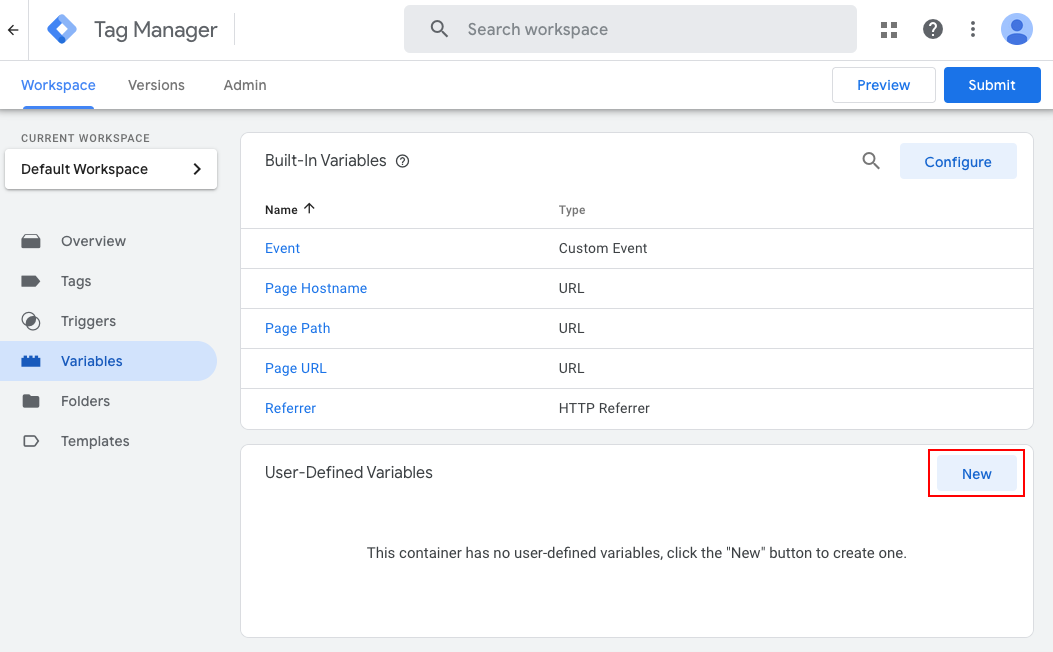
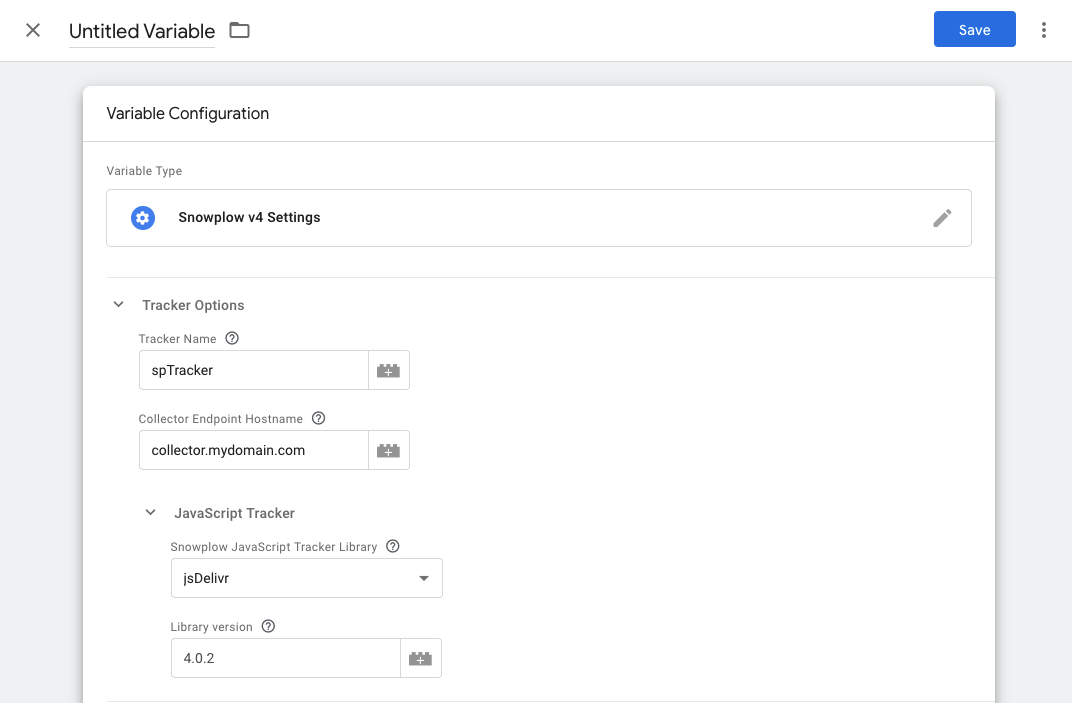
Configuring the Settings Variable
- Navigate to the
Variablestab in your GTM workspace and clickNewinUser-Defined Variables.
-
Select
Snowplow v4 Settingsfrom the list of available variables. -
Under
Tracker Options, enter your Snowplow collector endpoint set up when configuring your collector.
You might consider using conditional variables to set the Collector endpoint based on the environment, e.g. sending data to Snowplow Micro during development.
-
Under
JavaScript Tracker, choose a hosting option. To get started quickly, select eitherunpkgorjsDelivrand enter a library version. -
Give your variable a name and click
Save.
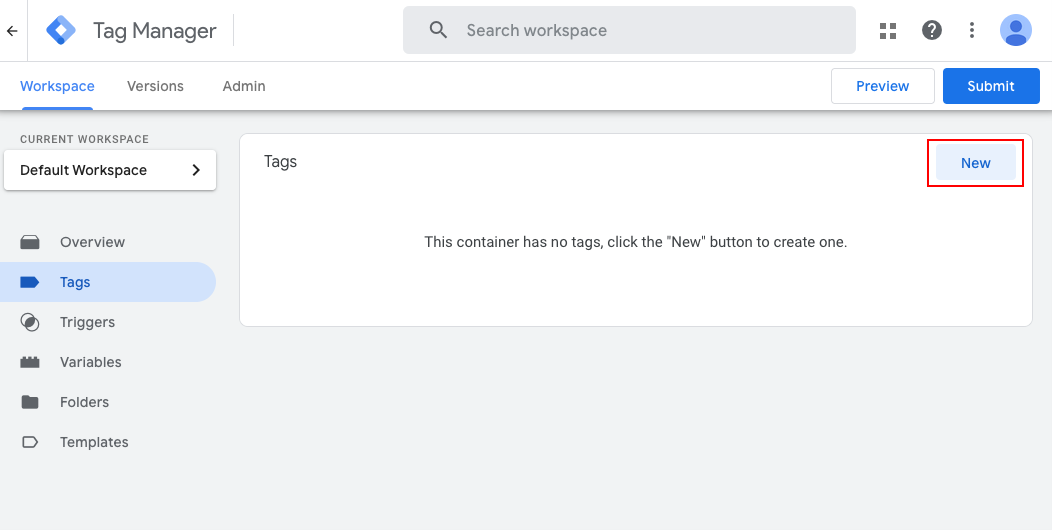
Implementing the Snowplow Tag
In this section, we will create a simple tag to fire a page view event.
- Navigate to the
Tagstab in your GTM workspace and clickNew.
-
Click on the
Tag Configurationsection and selectSnowplow v4. -
Set the
Tag TypetoPage View, if it is not already selected. -
Under
Tracker Initialisation, select the Snowplow Settings variable we created earlier. -
Add a trigger to the tag. This will determine when the tag is fired. For a page view tag, you can use the built-in
All Pagestrigger. -
Give your tag a name and click
Save.
Testing the Tag
To test the tag, you can use the GTM preview mode. Click the Preview button in the top right of the GTM interface. This will open a new tab with your website and the GTM preview console.
Ensure that you see the Page View event in your Snowplow pipeline. If you don't have a full pipeline set up yet, you can use Snowplow Micro or Snowplow Inspector to check that the event is sent correctly.