Create event forwarders in Console
Follow the steps below to configure a new event forwarder. See available integrations for destination-specific guides.
Step 1: Create a connection
A connection is a resource that stores the credentials and endpoint details needed to send events to your destination.
To create a connection from Snowplow Console, first go to Destinations > Connections, then select Set up connection. From the dropdown, choose Loader connection, then select the destination you want to forward events to. Each destination will have specific authentication and endpoint details required.
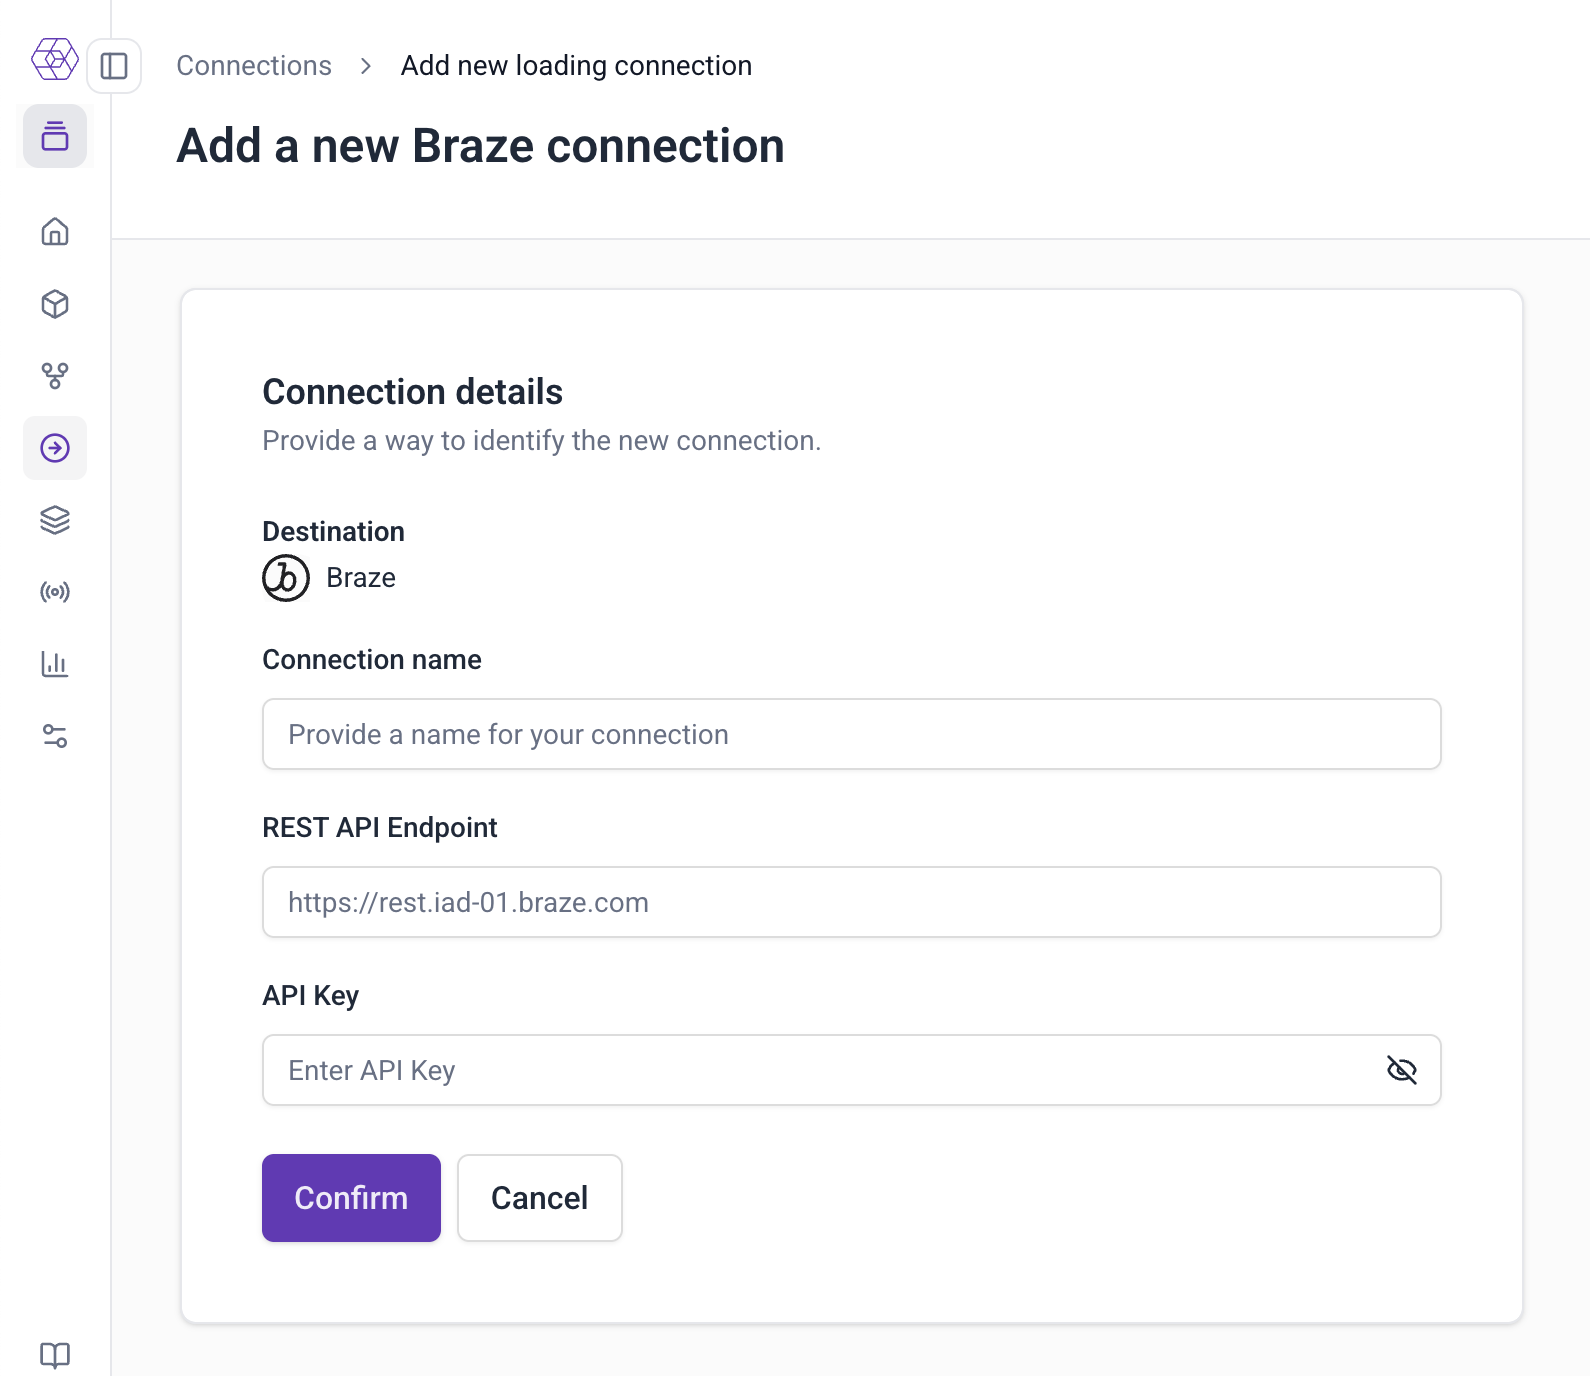
When finished, click Deploy. Once a connection is deployed, you can use it in one or more forwarders to connect to your destination.
Step 2: Create a new forwarder
- Go to Destinations > Destination list.
- Navigate to the Available tab and select Configure on the destination card from the list of available integrations to start setting up the forwarder.
- Give the forwarder a name, select the pipeline you want the forwarder to read events from, and choose the connection you created in step 1.
- Optionally, you can choose to Import configuration from an existing forwarder. This is helpful when migrating a forwarder setup from development to production.
- Click Continue to configure event filters and data mapping.
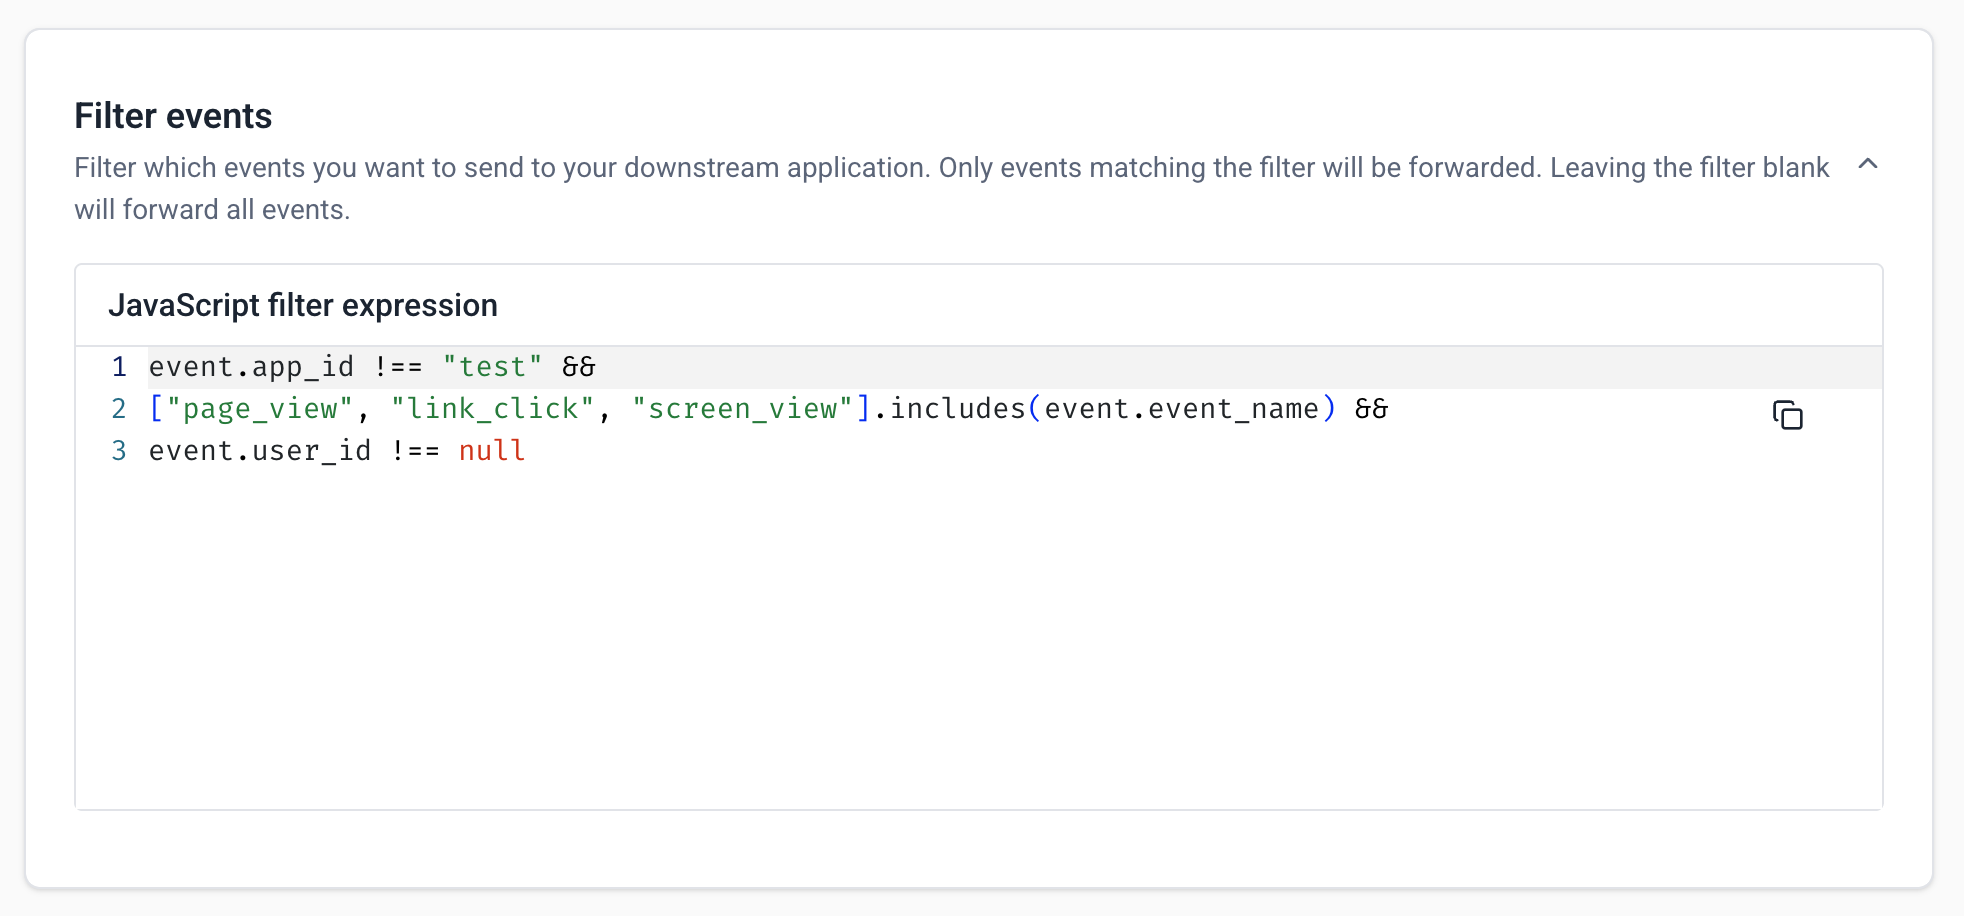
Step 3: Configure event filters and field mapping
Forwarders use JavaScript expressions to define which events to forward and how to map Snowplow data to your destination's required schema.
Event filtering
Use JavaScript expressions to select which events to forward. Only events that return true when evaluated against your filter will be sent to your destination.
Use the event object to reference fields on your Snowplow payloads. For example:
// Forward page views from website
event.app_id == "website" && event.event_name == "page_view"

// Forward a list of custom events
["add_to_cart", "purchase"].includes(event.event_name)
Leave the filter blank to forward all events.
Field mapping
Define how Snowplow data maps to your destination fields. For each mapping, Destination Field represents the property name and Snowplow expression is a JavaScript expression used to extract data from your Snowplow event. Snowplow provides default mappings based on common fields, but you can overwrite or delete them as needed.

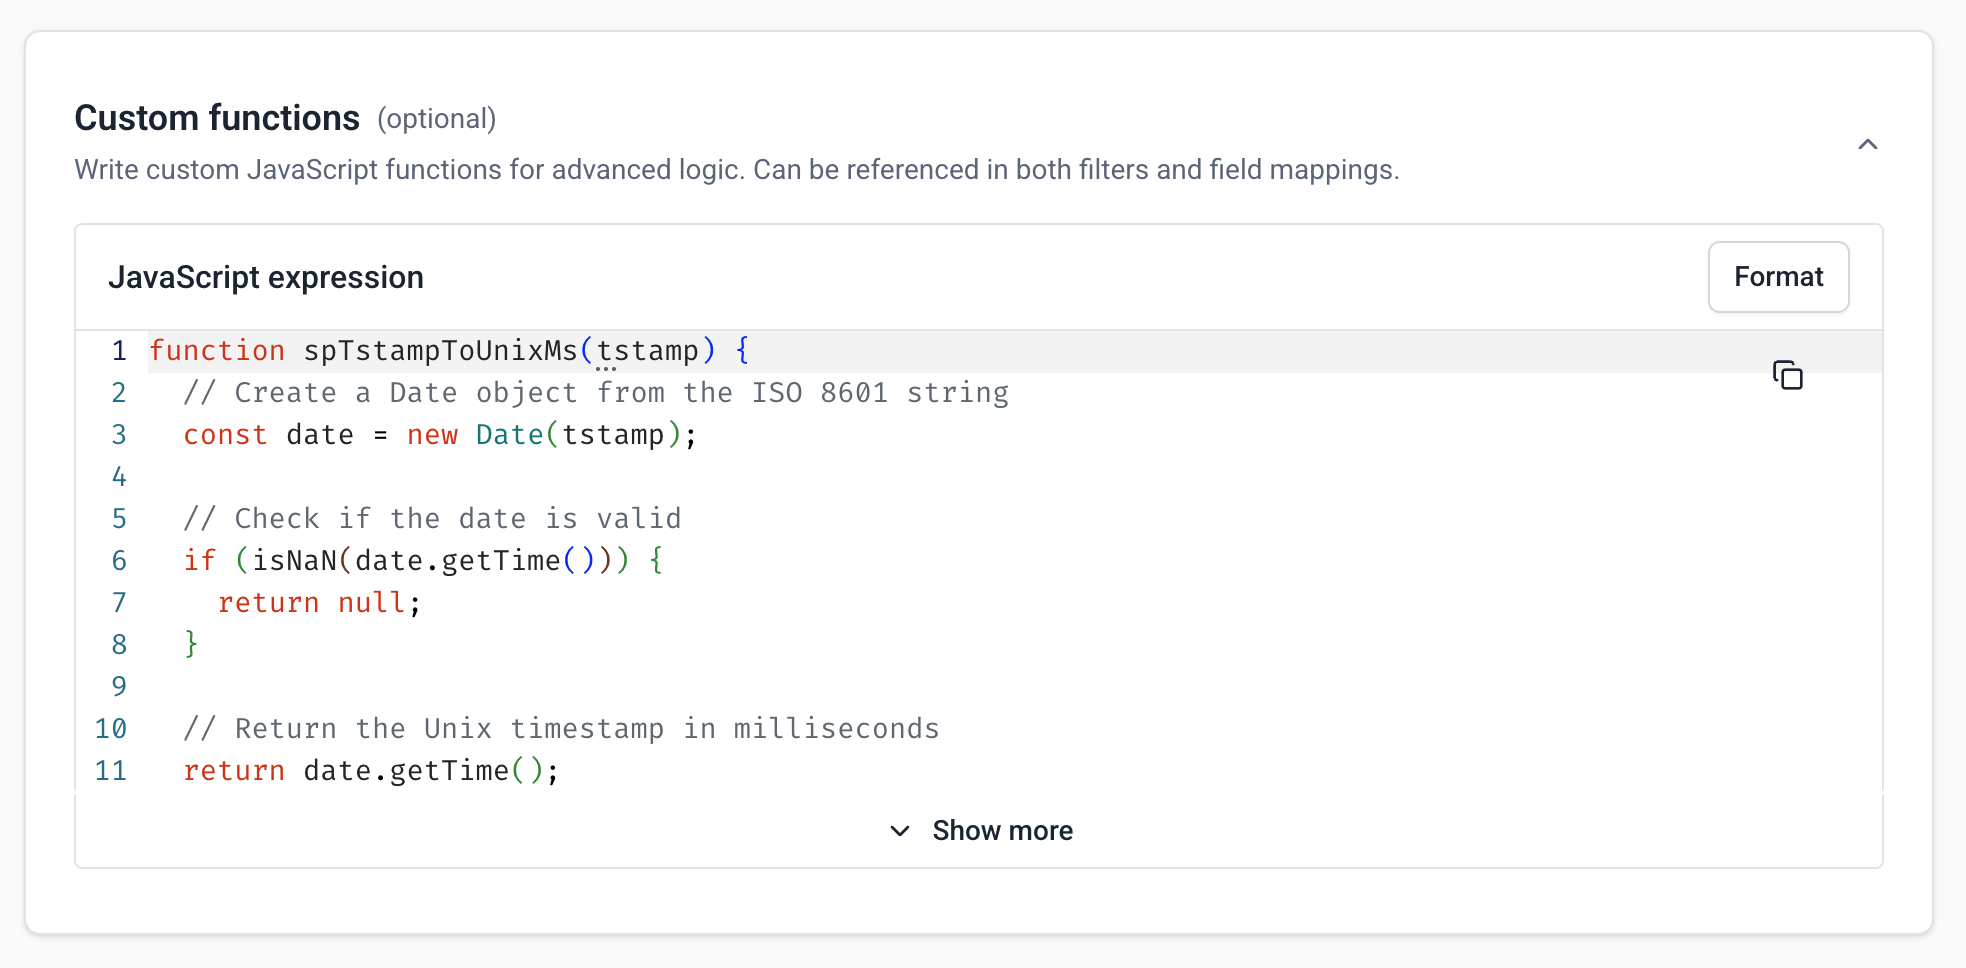
Custom functions
You can also write JavaScript functions for complex data transformations. Examples include converting date formats, transforming enum values, combining multiple fields, or applying other business logic. You can then reference functions in both the event filter and field mapping sections.
To learn more about the supported filter and mapping expressions, check out the filter and mapping reference.
Step 4: Test your transformations
Once you've defined your filter and mapping configuration, you can test it against a sample event and preview what the output JSON payload looks like. Choose an event from the Select sample input event dropdown and selecting Run test.
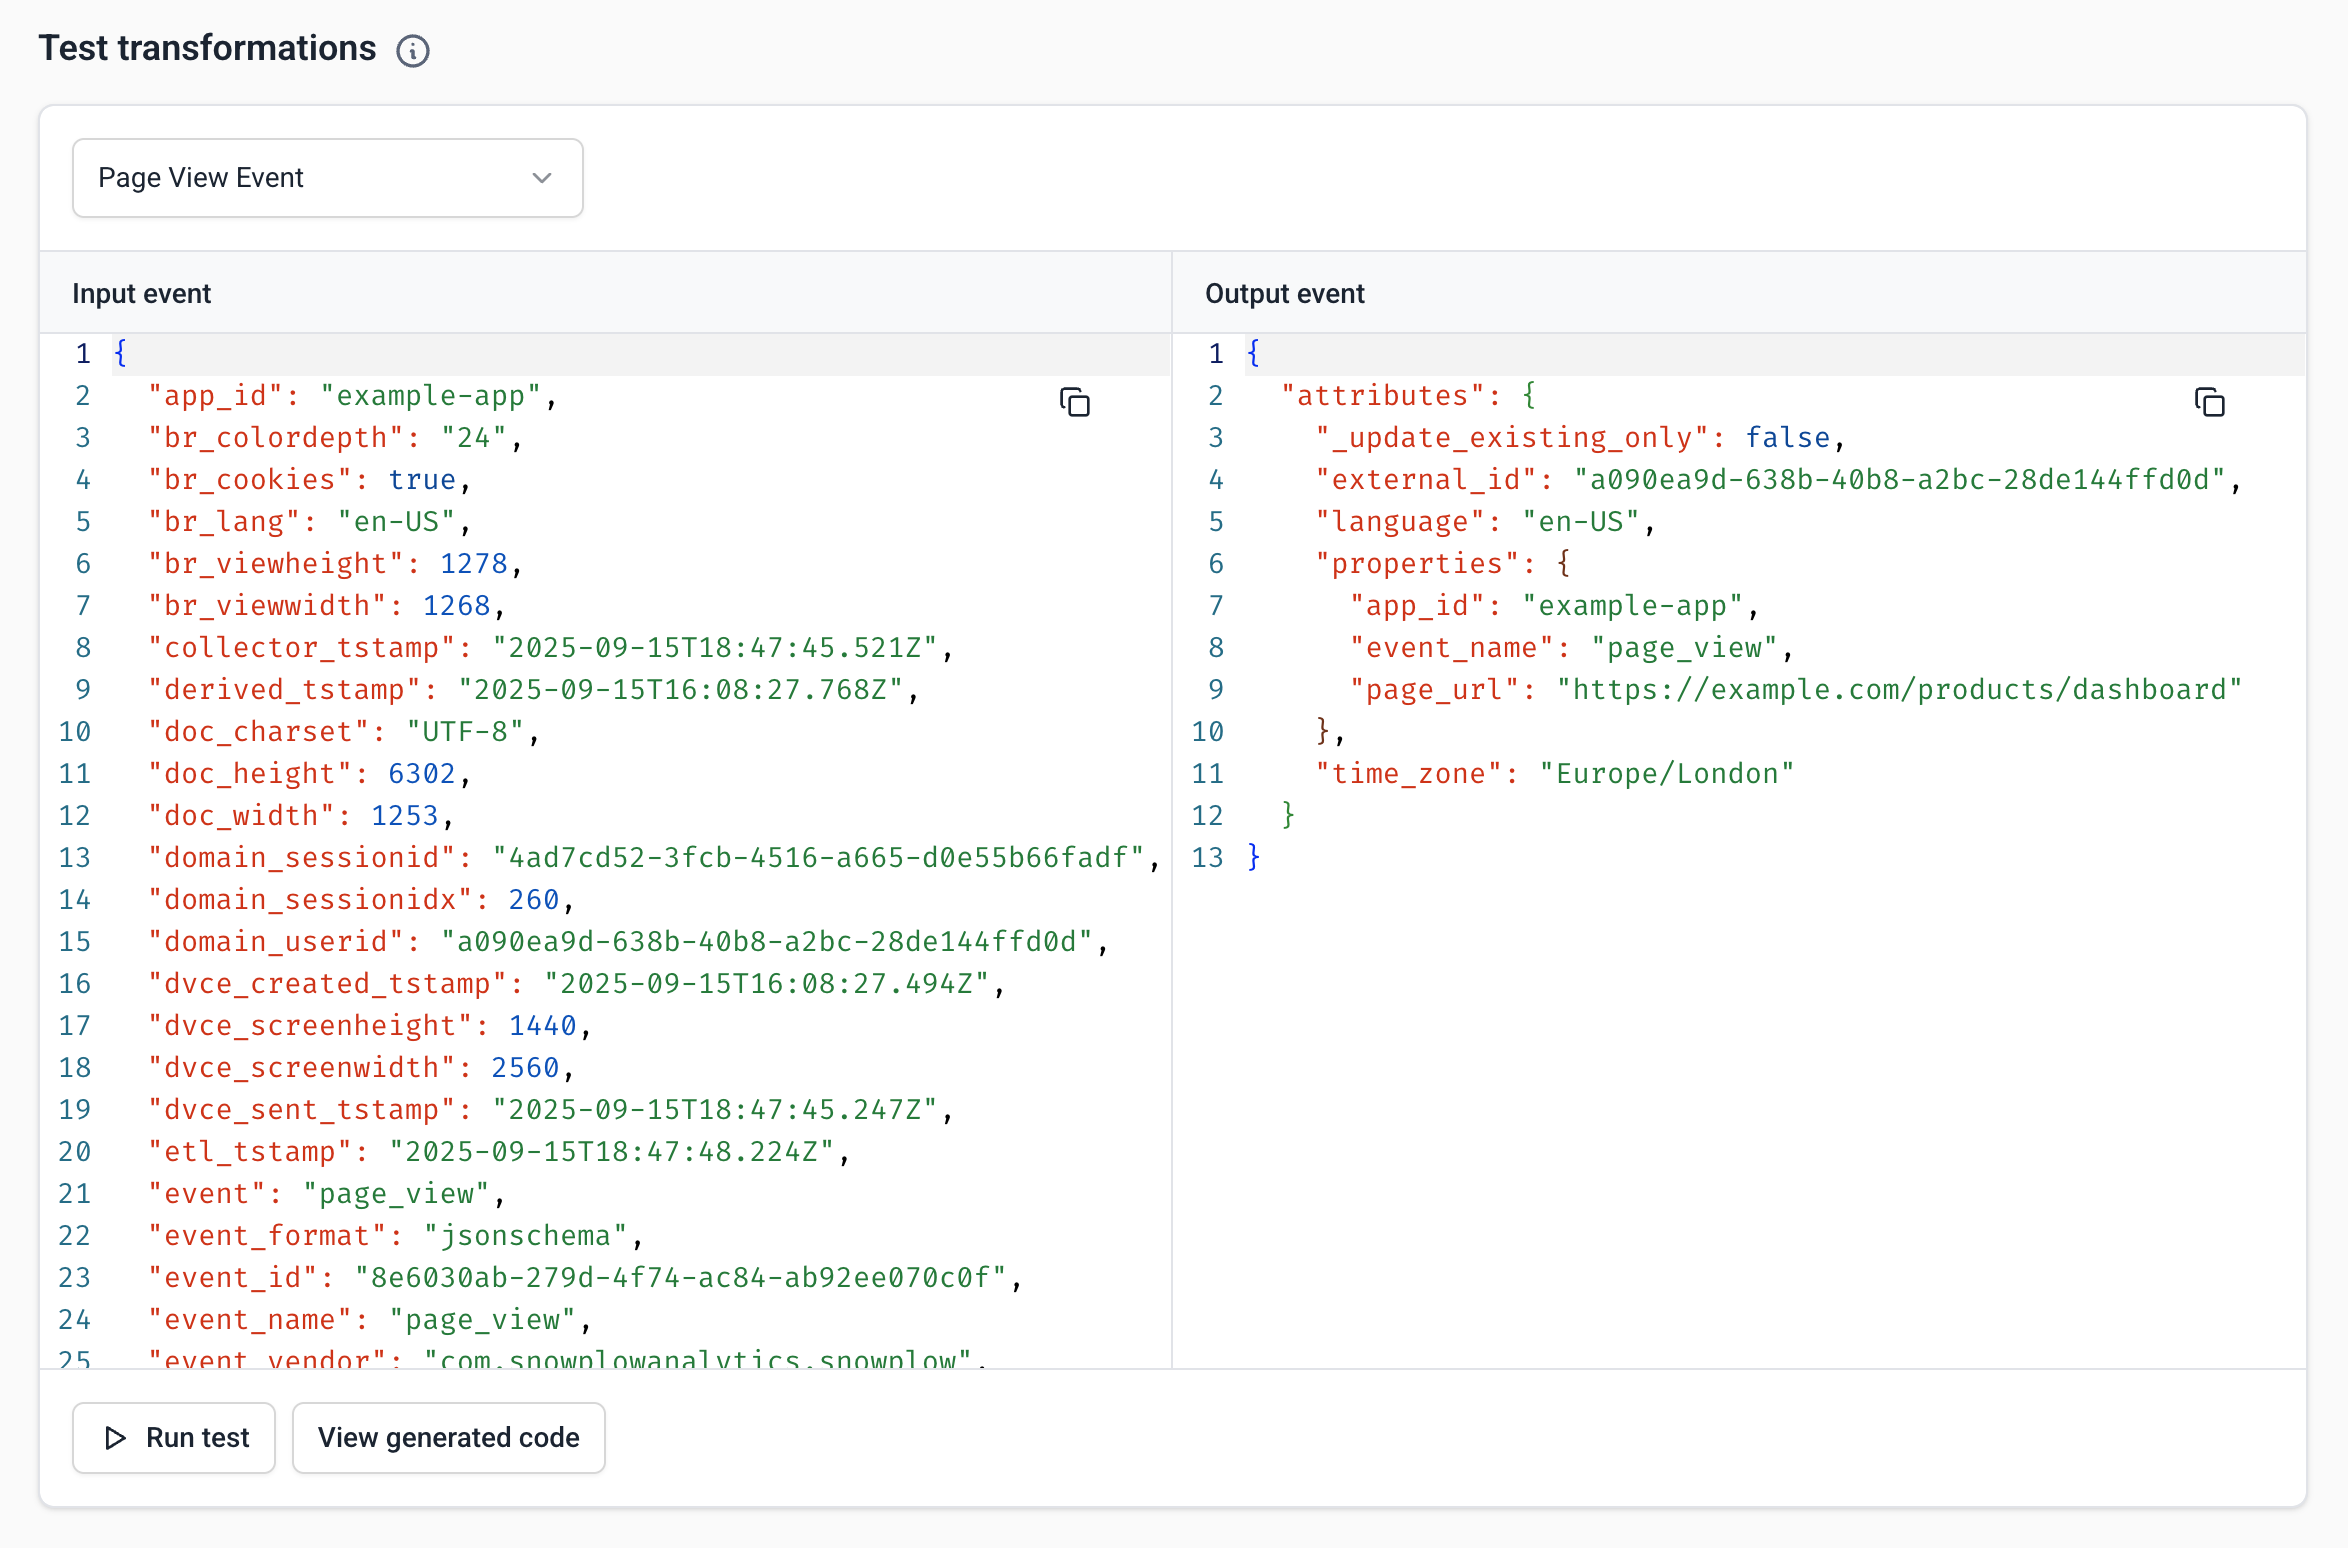
Snowplow provides a few out-of-the-box sample events to test with, which you can edit as needed. You can also choose Custom event to paste in your own JSON-formatted Snowplow event. You can use Snowplow Micro with the --output-json flag to generate your own events to test with.
Select View generated code to see the JavaScript function generated from your filters, field mappings, and custom functions. This is exactly what will run when transforming events for your destination, and can be used directly in a Snowbridge JavaScript transformation for local testing.
If there is an error with your configuration, the generated code will show the line number which contains the error.
Step 5: Deploy
When you're done, select Deploy to save your configuration and create the forwarder. This will deploy the underlying Snowbridge instance to your cloud account and begin forwarding events based on your configuration. It typically takes a few minutes to deploy a new forwarder.