Testing
Testing on Web using the Snowplow Chrome Extension
The Snowplow Chrome Extension can be used to ensure the event was emitted correctly but the browser extension does not check that the event was processed correctly.
Step 1: Installation
Install the Snowplow Chrome Extension , you may need to restart your browser.

Step 2: Check your data
Open up devtools (F12) and navigate to the Snowplow extension. In a regular setup you should probably see a list of Pageview and media player events start to form as you interact with your site.

Click on an event to get a breakdown of the data being captured.

Testing using Snowplow Micro
We will be using Snowplow Micro as a small replacement of a Snowplow pipeline for local testing. Snowplow Micro is a local Web server that lets you inspect tracked events.
Step 1: Start Micro using Docker
You will need to have Docker installed. See the instructions here in case you don’t have it installed yet.
The following command can be used to run Micro using Docker:
docker run -p 9090:9090 snowplow/snowplow-micro:2.0.0
Step 2: Install and start ngrok
Additionally, you will need the Micro server to be accessible to your mobile devices or emulator VMs. The easiest way to achieve this is through the ngrok proxy that creates a publicly accessible URL for your local server. You can install ngrok on macOS using the following command (see here for installation options on other platforms):
brew install ngrok/ngrok/ngrok
You will need to sign up on the ngrok website and get an authtoken that you can then add to your ngrok installation using:
ngrok config add-authtoken <token>
Finally, you can start ngrok as follows:
ngrok http 9090
This will start the proxy and show you the “Forwarding” URL at which your Micro will be accessible (it has the format https://XXXX-XX-XX-XXX-XX.ngrok.io)
Step 3: Configure the endpoint in your app
Enter the forwarding URL in the createTracker call in your app. Build and run your app in an iOS simulator, Android emulator, or an actual device and use the app so that a number of events are tracked.
Step 4: Check your data
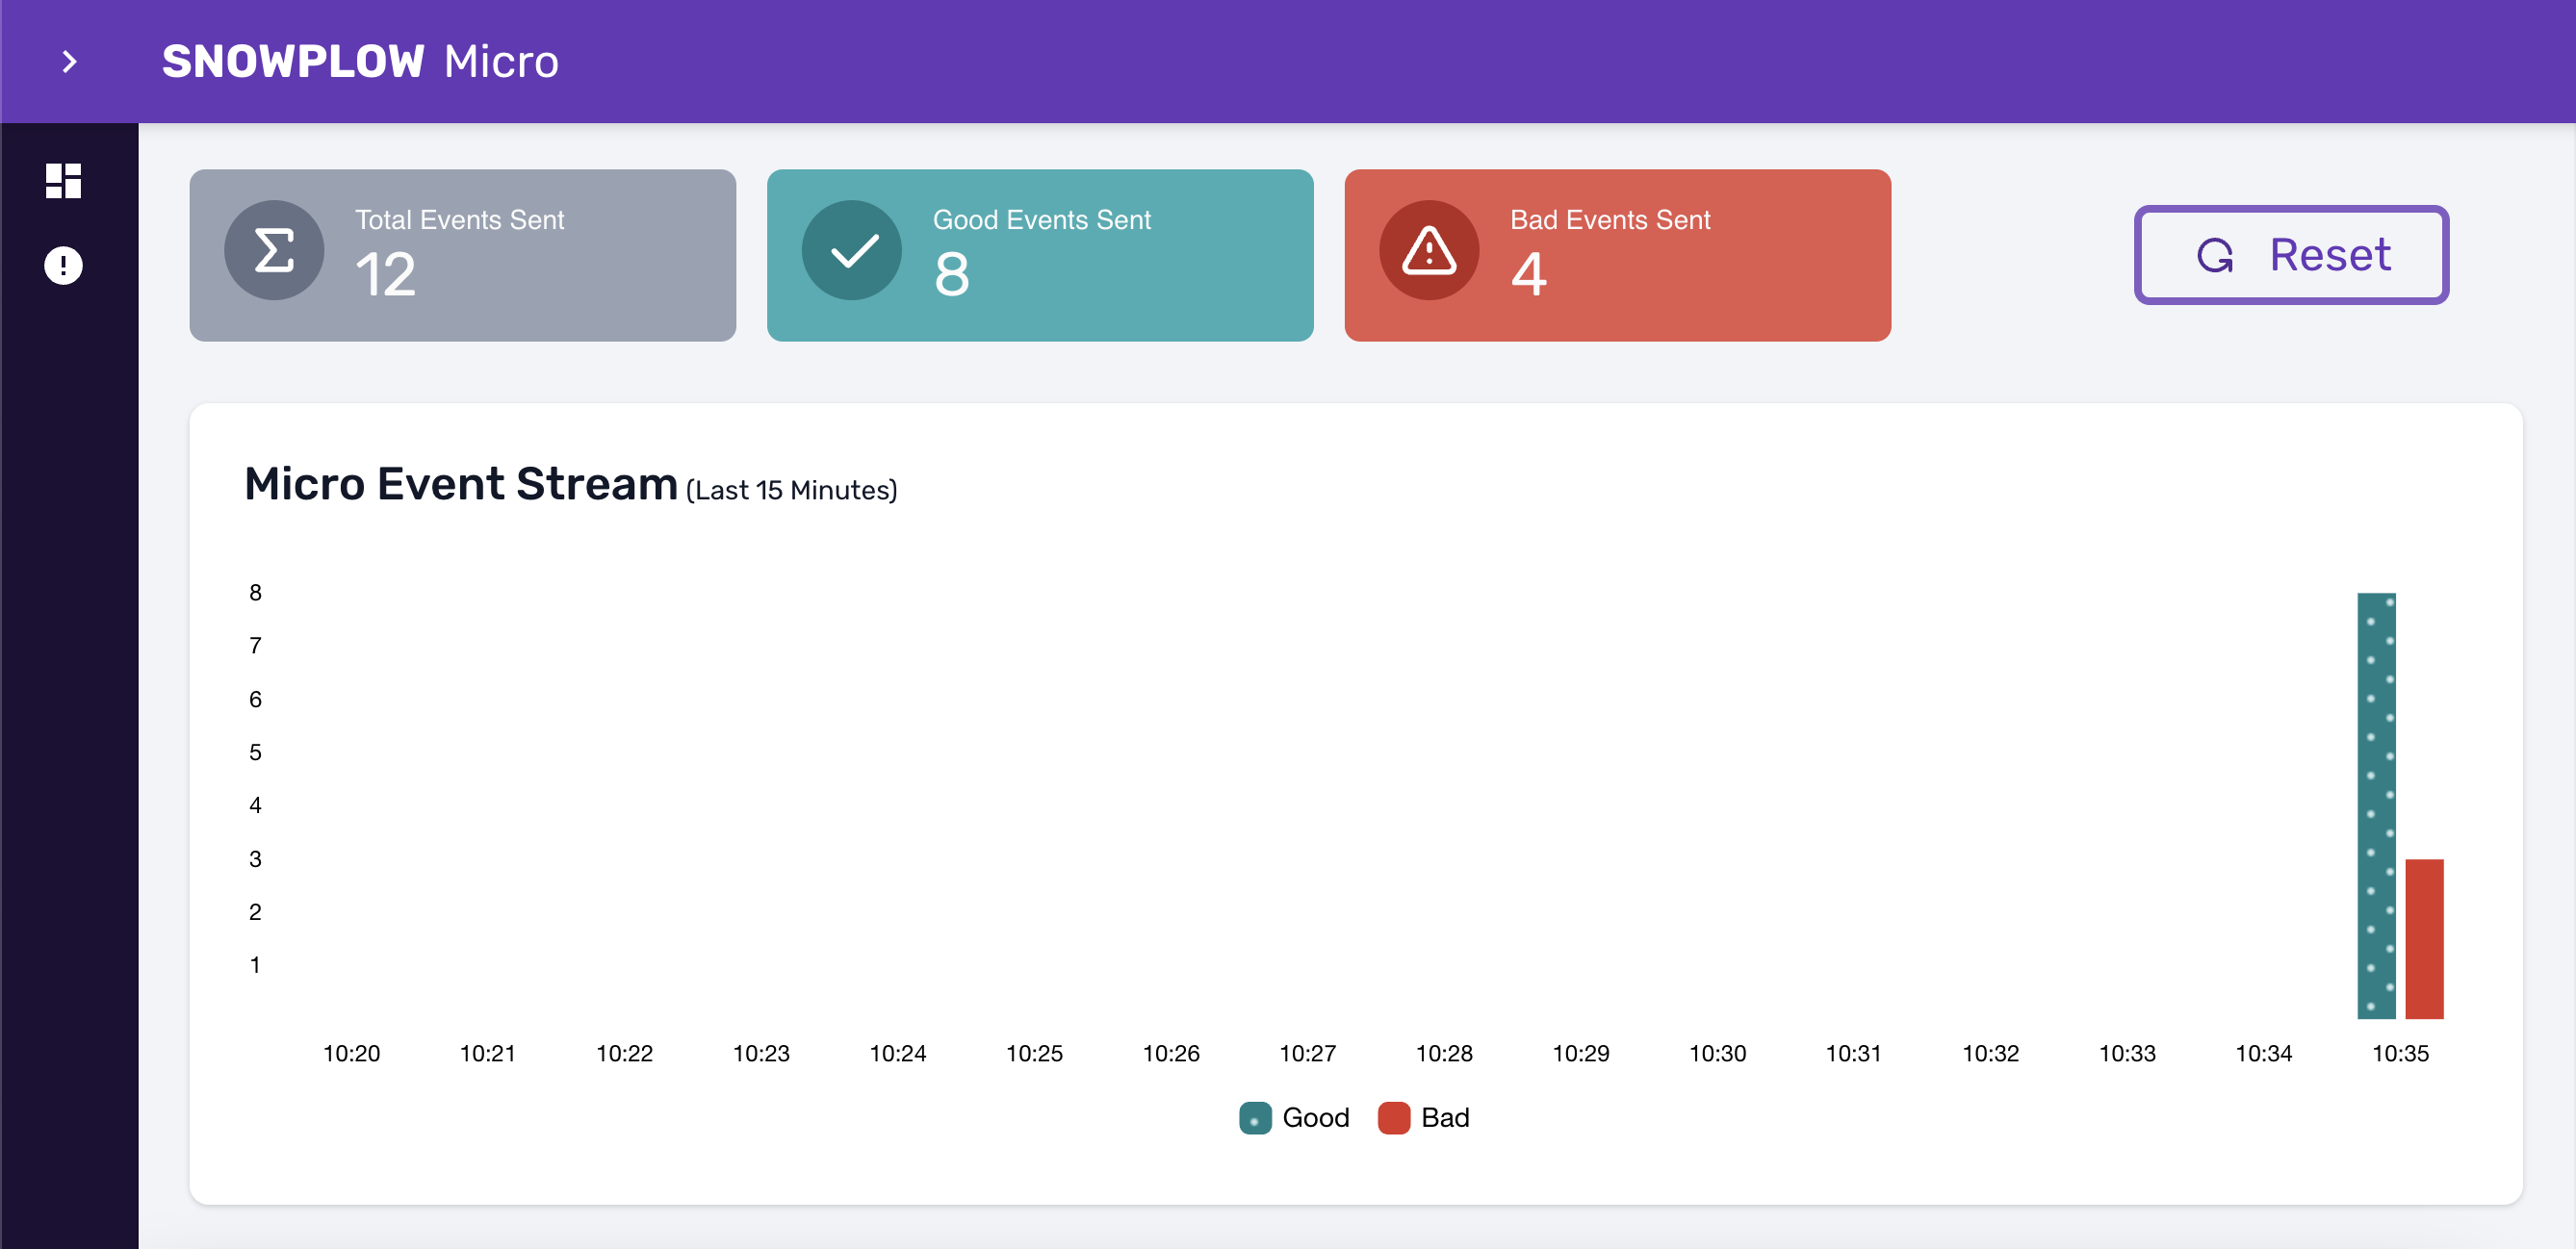
Navigate to http://localhost:9090/micro/ui on your computer to see the number of tracked events. You should see an chart showing the number of events that passed validation (good) and failed validation (bad) over time.
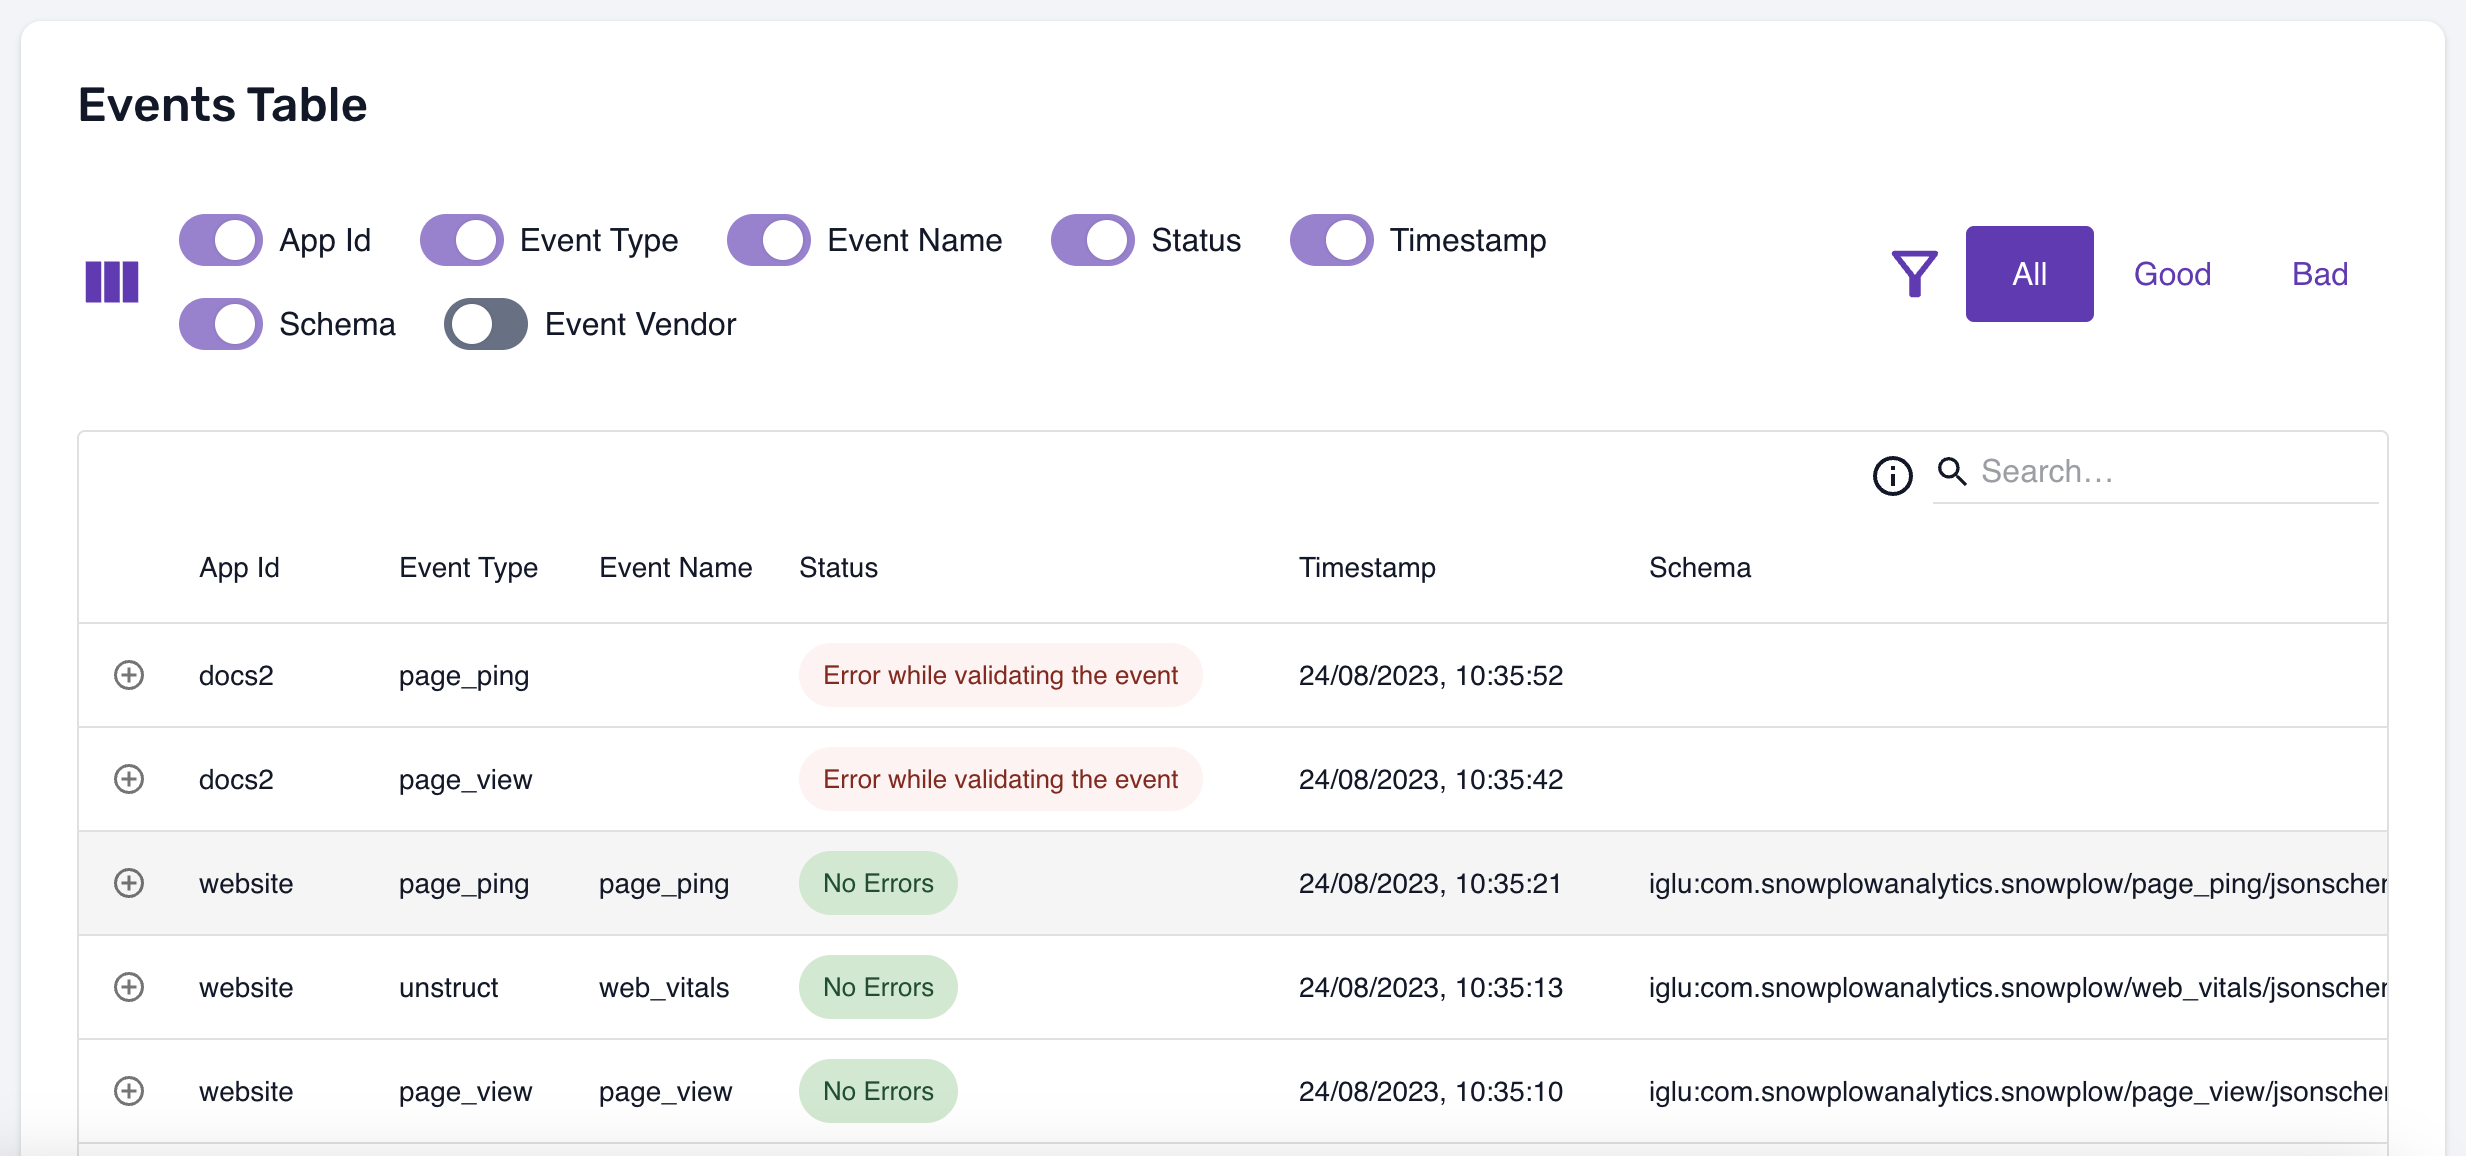
Under the chart, you will see a table with the tracked events that you can inspect.